How to edit a label template
Overview
The Edit Label Template feature in RMS allows you to easily update existing label formats to keep them aligned with operational needs. You can open any template and adjust key details such as the label name, type, HTML code, number of printable copies, and assigned printer - ensuring each label remains accurate and up to date as workflows evolve. This quick, flexible editing process helps maintain consistency and efficiency across all warehouse labeling activities.
How to edit a label template
- Log in to Returns Management System (RMS).
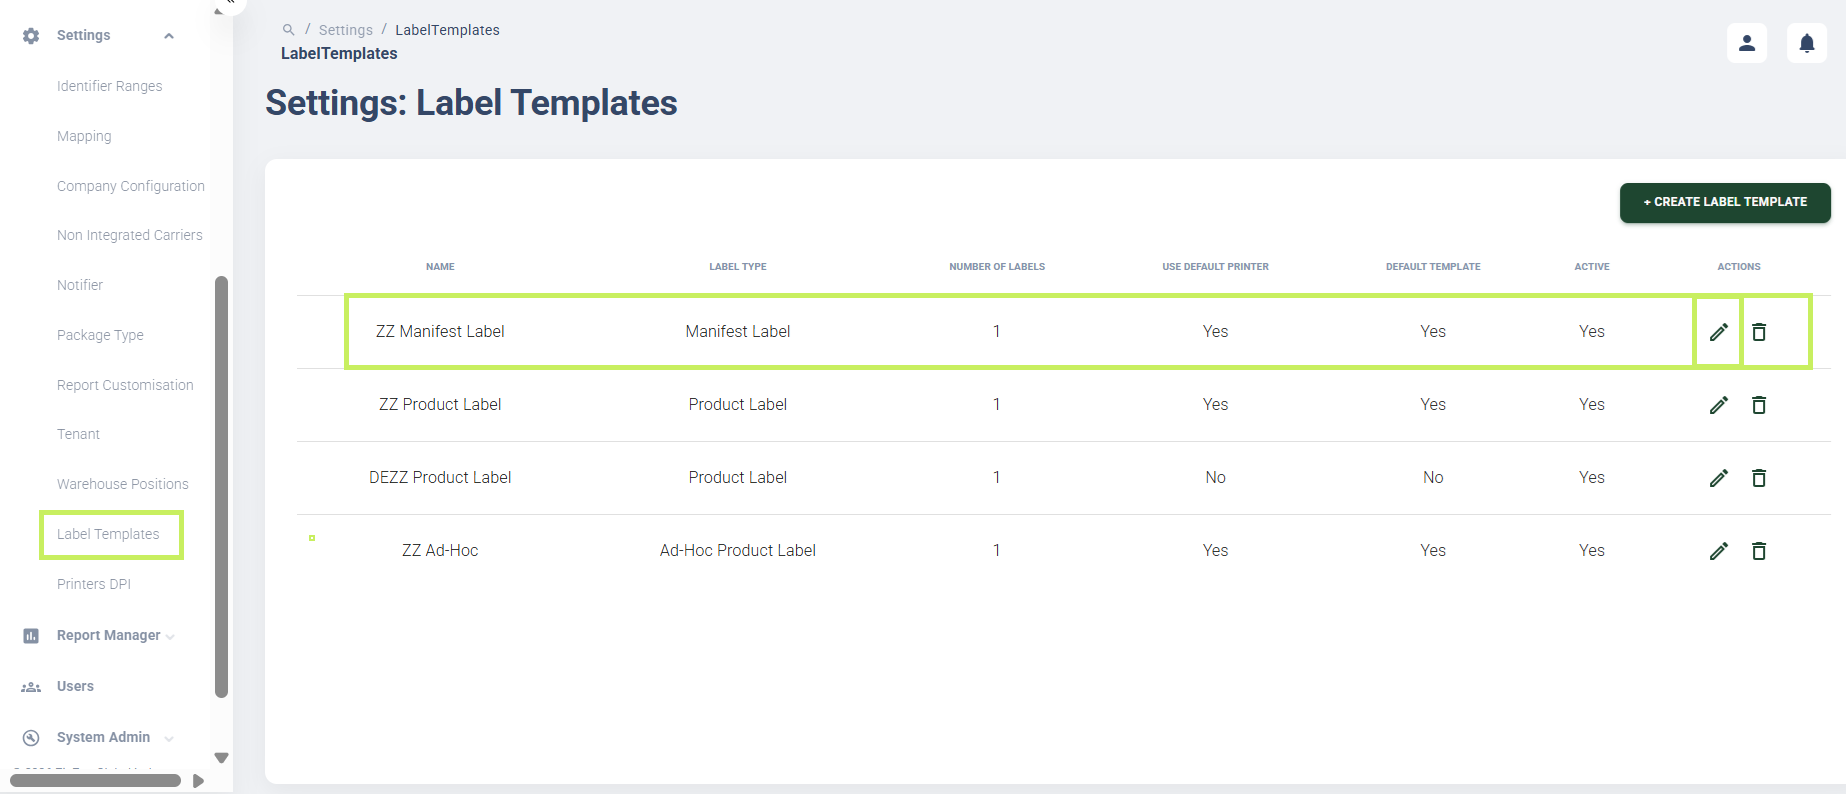
- On the sidebar menu, click Settings. A dropdown list of setting properties appears below Settings.
- Click Label Templates. The Settings: Label Templates page appears on the right.
- Click the Edit (Pen) icon for the label template you want to edit.
An Edit Label Template dialog window appears.
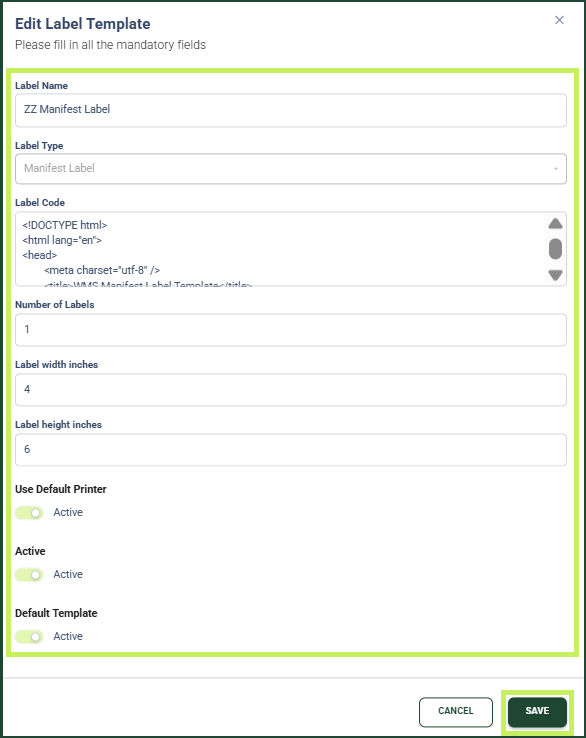
- In the Edit Label Template dialog, you can edit the following fields:
- Label Name - edit the name of the label template
- Label Type - from the drop-down menu, edit the label type of the label template
- Label Code - edit the HTML code for the new label template
- Number of Labels - edit the number of times the label template can be printed
- Label width inches - edit the label width in inches
- Label height inches - edit the label height in inches
- Use Default Printer - switch to Active to make your printer the default one for label printing or to Inactive if you don't want to use it as a default printer
- Active - switch to Yes to make the label template active or to No to make it inactive
- Default Template - switch to Active to make the label template the default one for label printing or to Inactive if you don't want to use it as a default template
- Click Save.