How to create a new label template
Overview
The Create Label Template feature in RMS allows you to quickly build custom label formats tailored to your operational needs. You can define a template’s name, select the label type, enter the HTML label code, set the number of printable copies, and assign a printer - ensuring every label produced meets the warehouse’s exact specifications. This streamlined setup gives you full control over label design and output, supporting consistent, accurate, and efficient parcel handling across the operation.
How to create a new label template
- Log in to Returns Management System (RMS).
- On the sidebar menu, click Settings. A dropdown list of setting properties appears below Settings.
- Click Label Templates. The Settings: Label Templates page appears on the right.
- Click the Create Label Template button on the top right side of the page.
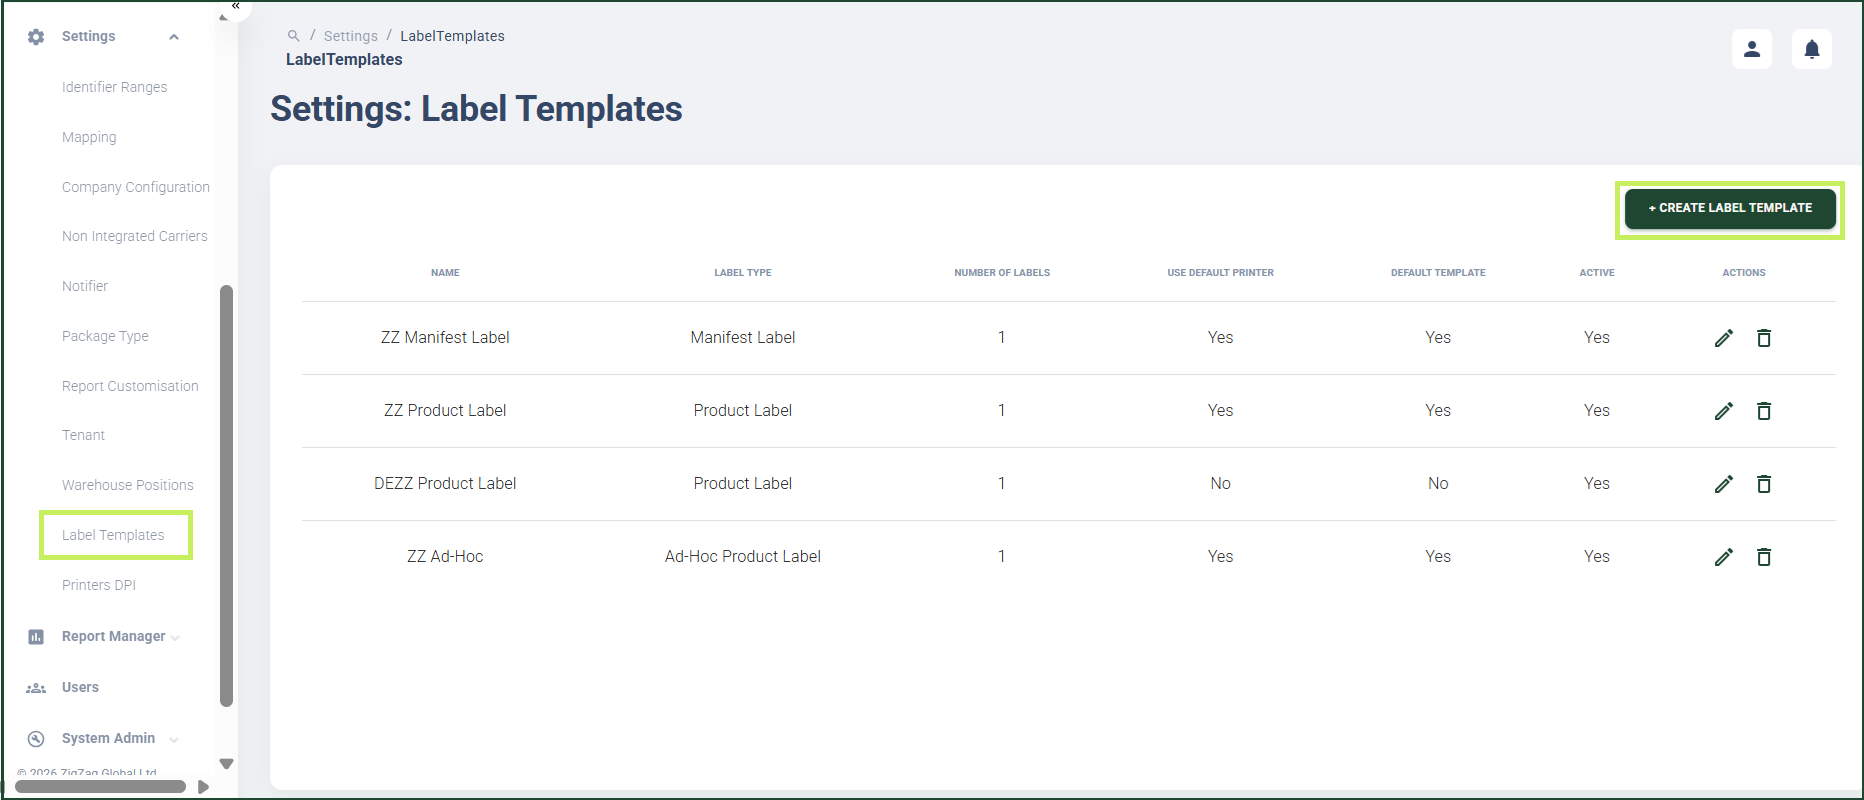
A Create Label Template dialog window appears.
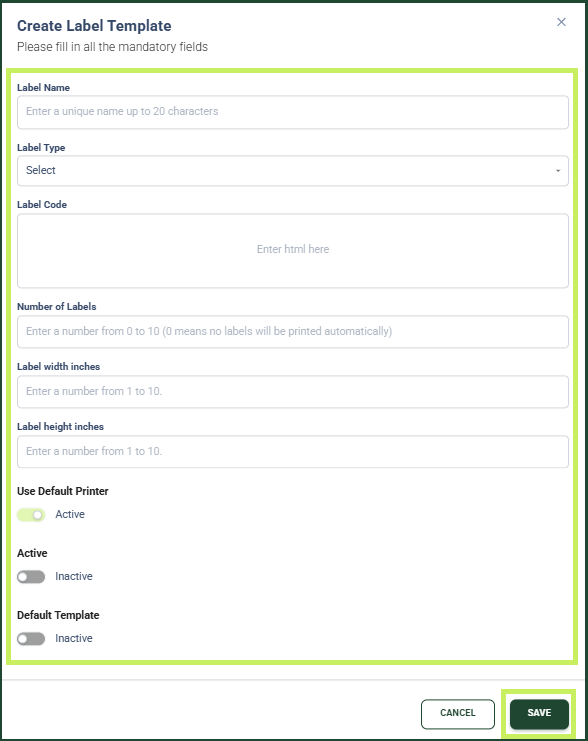
- In the Create Label Template dialog window, fill in the following fields:
- Label Name - fill in the name of the new label template
- Label Type - from the drop-down menu, select the label type of the new label template
- Label Code - fill in the HTML code for the new label template
- Number of Labels - fill in the number of times the label template can be printed
- Label width inches - fill in the label width in inches
- Label height inches - fill in the label height in inches
- Use Default Printer - switch to Active to make your printer the default one for label printing
- Active - switch to Yes to make the label template active
- Default Template - switch to Active to make the label template the default one for label printing
- Click Create.