How to create a new warehouse position
Overview
Creating a new warehouse position in RMS allows your operations team to define clear routing rules for returned parcels, ensuring items move efficiently through your warehouse network. The structured setup enables RMS to automatically suggest accurate routing paths, reducing manual effort and improving the speed and reliability of returns processing.
How to create a new warehouse position
- Log in to Returns Management System (RMS).
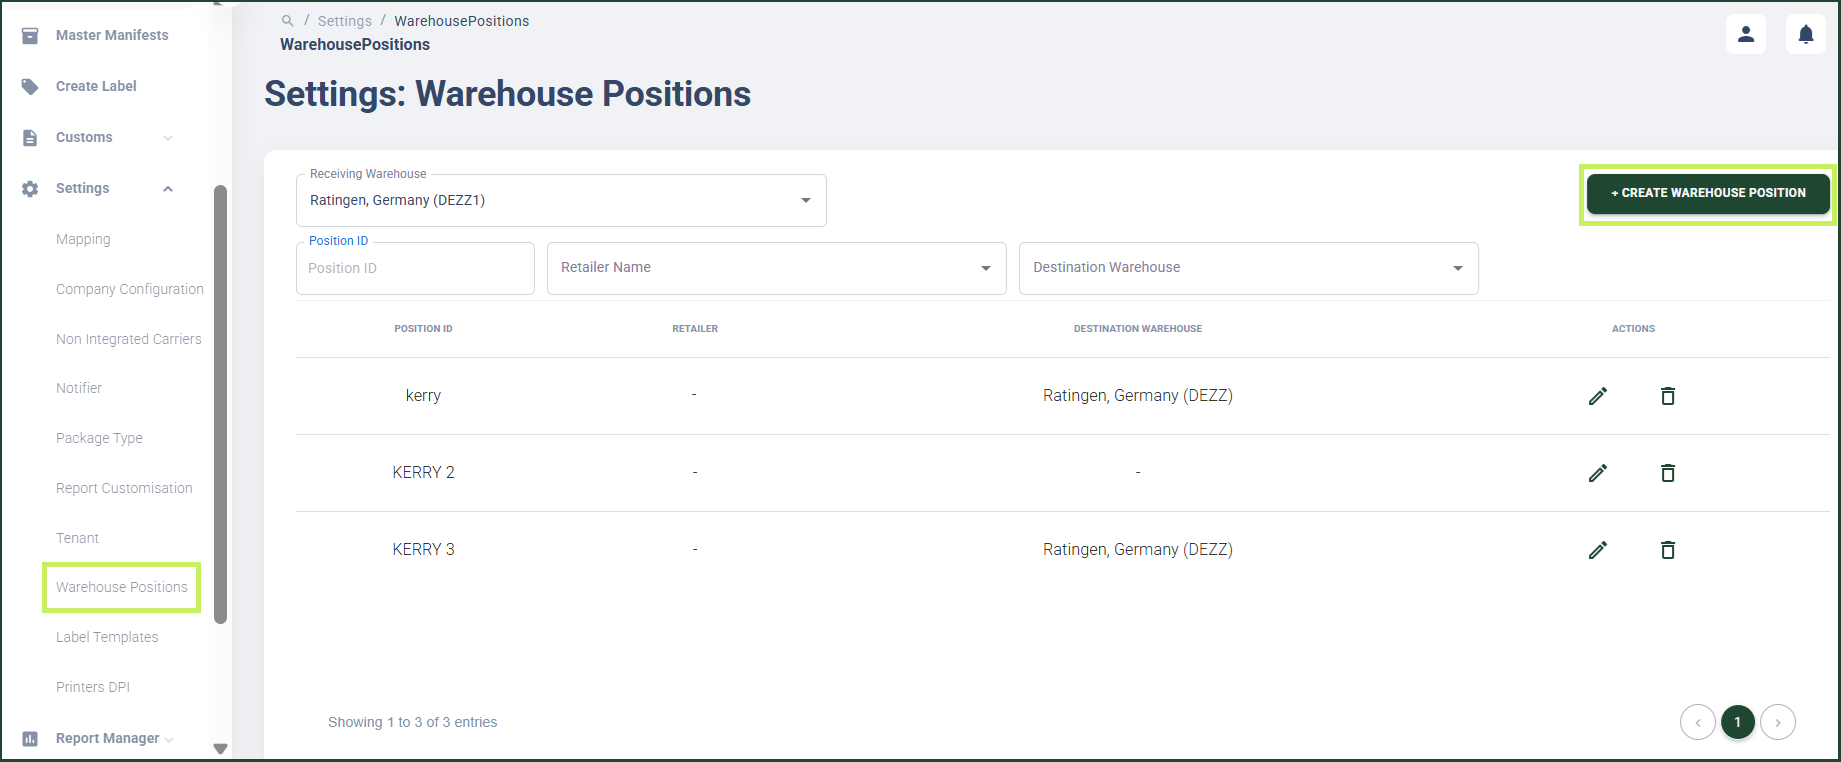
- On the sidebar menu, click Settings. A dropdown list of setting properties appears below Settings.
- Click Warehouse Positions. The Settings: Warehouse Positions page appears on the right.
- Click the Create warehouse position button on the top right side of the page.
A Create new warehouse position dialog window appears.
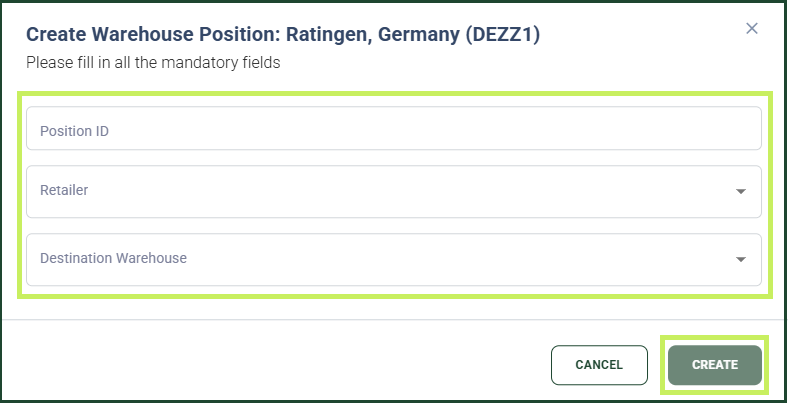
- In the Create new report dialog window, fill in the following fields:
- Position ID - fill in the ID of the new warehouse position
- Retailer Name - from the drop-down menu, select the retailer name for whom you create the new warehouse position
- Destination Warehouse - from the drop-down menu, select the destination warehouse to which the parcel must be shipped.
- Click Create.