How to create a notifier
Overview
Creating a notifier in RMS allows your organisation to automate key operational updates by sending real‑time event notifications to connected systems such as CDEx or ZigZag Core. Through a simple guided setup, you can define a notifier’s name, endpoint, authentication details, data source, and the specific event - such as Received, In Consolidation, or Consolidated - that should trigger the alert. This streamlined configuration ensures accurate, timely data flow across platforms, reducing manual effort and improving overall operational visibility.
How to create a notifier
- Log in to Returns Management System (RMS).
- On the sidebar menu, click Notifier. The Settings: Notifier page appears on the right.
- Click the Create Notifier button on the right side of the Settings: Notifier page.
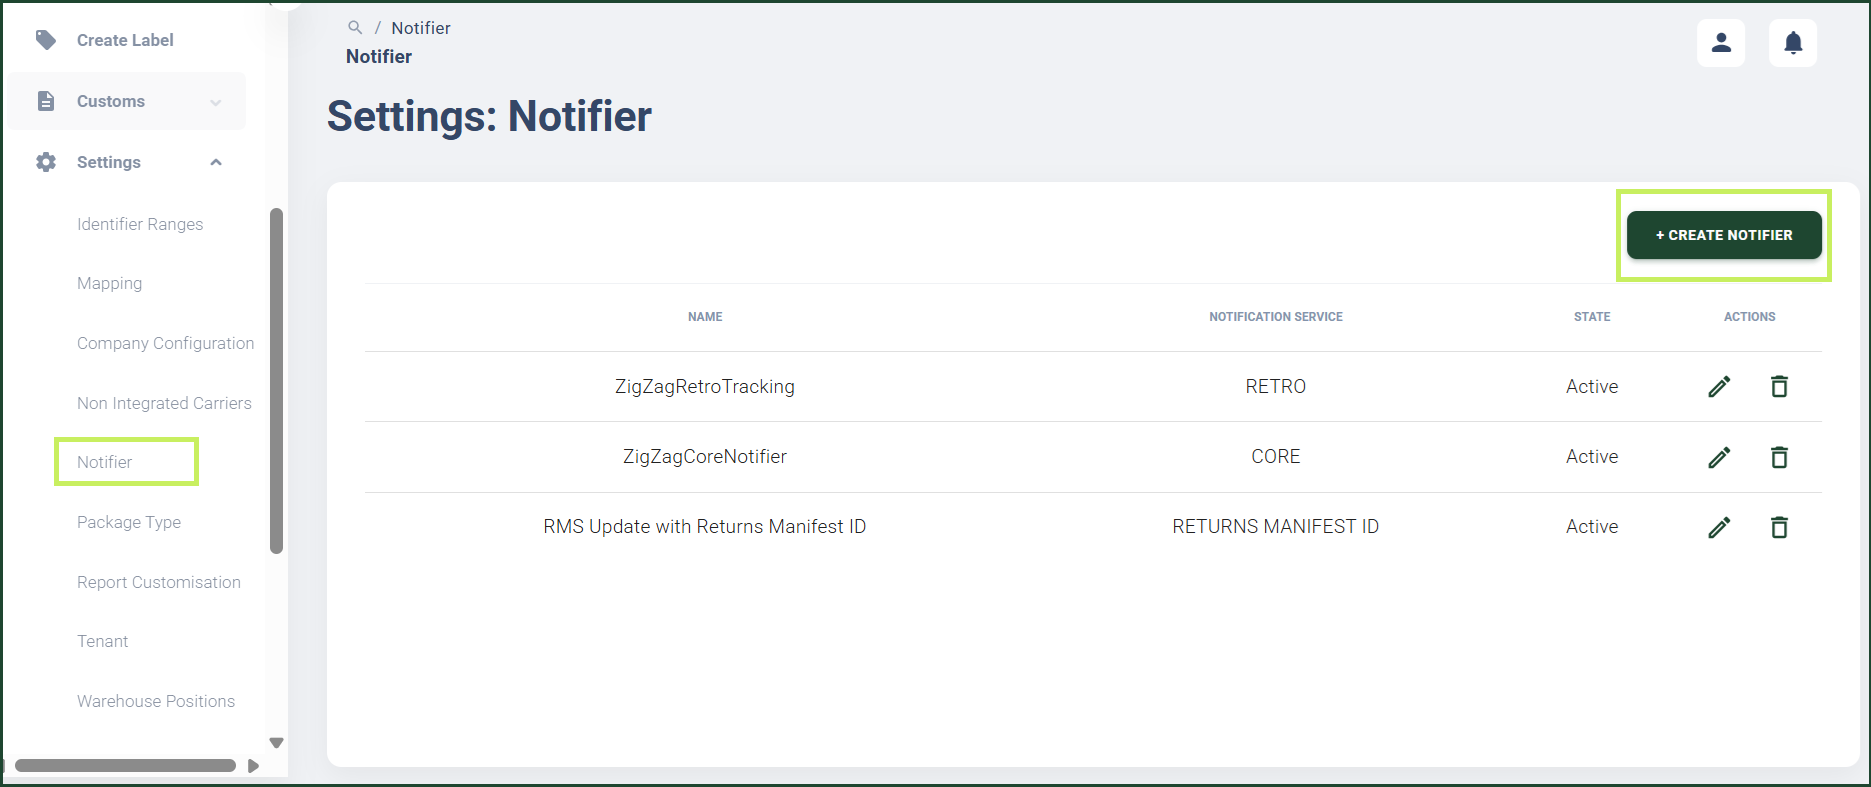
A Create Notifier dialog window appears.
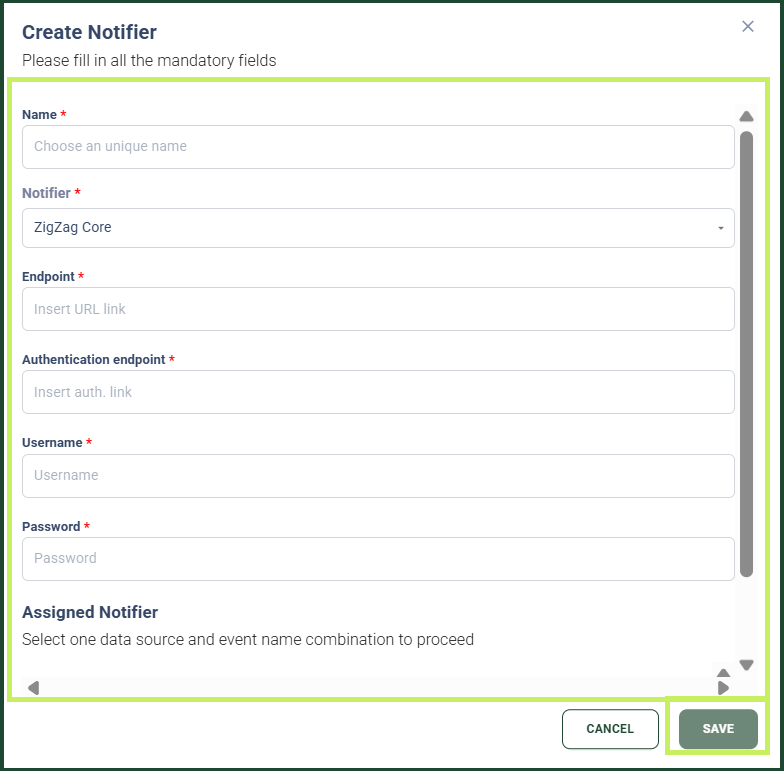
- In the Create Notifier dialog window, fill in the following fields:
- Name - fill in the unique name of the notifier you want to create
- Notifier - from the drop-down menu, select the notifier type
- Endpoint - fill in the endpoint to which the notifier will be sent
- Authentication endpoint - fill in the endpoint to which RMS will send authentication details
- Username - fill in the username for the notifier authentication process
- Password - fill in the password for the notifier authentication process
- Data Source - from the drop-down menu, select the environment from which the parcel data is sourced and for which a notification will be triggered
- Event Name - from the drop-down menu, select the name for the notification event.
- Click Save.