How to edit a non-integrated carrier
Overview
In RMS, editing a non‑integrated carrier allows your team to keep carrier details accurate and aligned with your operational needs. From the Non‑Integrated Carriers settings page, authorised users can open an existing carrier and update its name, adjust available service levels, or refine configuration details to ensure they reflect current shipping processes. This flexibility ensures your RMS environment stays up to date, even when working with carriers that do not rely on automated integrations.
How to edit a non-integrated carrier
- Log in to Returns Management System (RMS).
- On the sidebar menu, click Settings. A dropdown list of setting properties appears below Settings.
- Click Non-Integrated Carriers. The Settings: Non-Integrated Carriers page appears on the right.
- On the Settings: Non-Integrated Carriers page, click the Edit (Pen) icon for the carrier you want to edit.
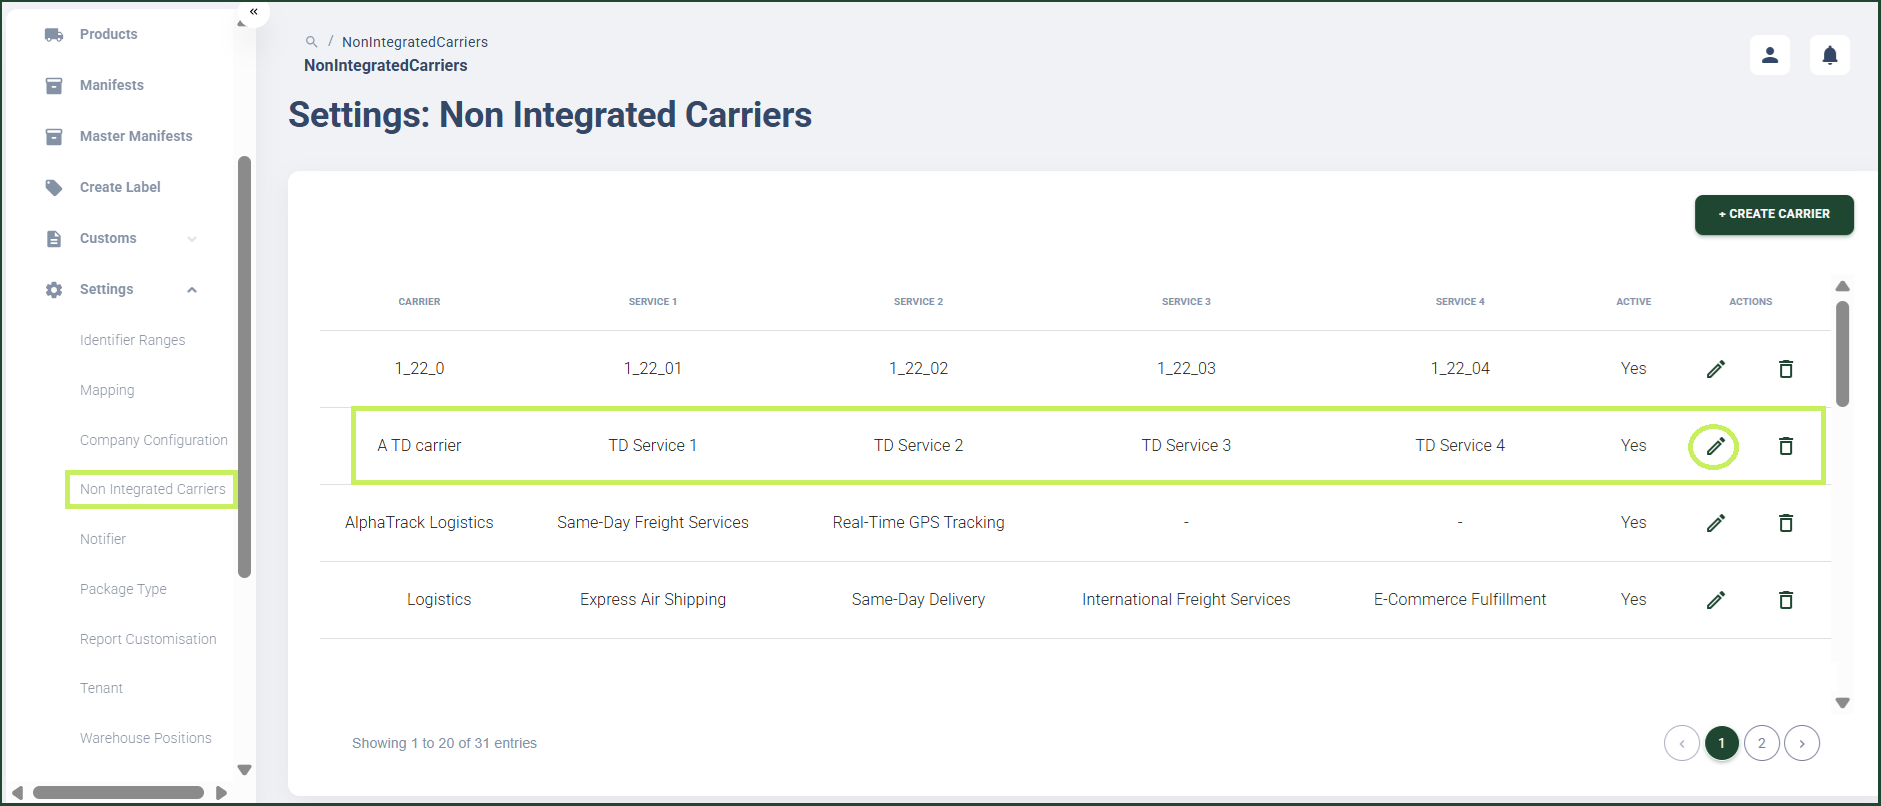
A Create Non-Integrated Carrier dialog window appears.
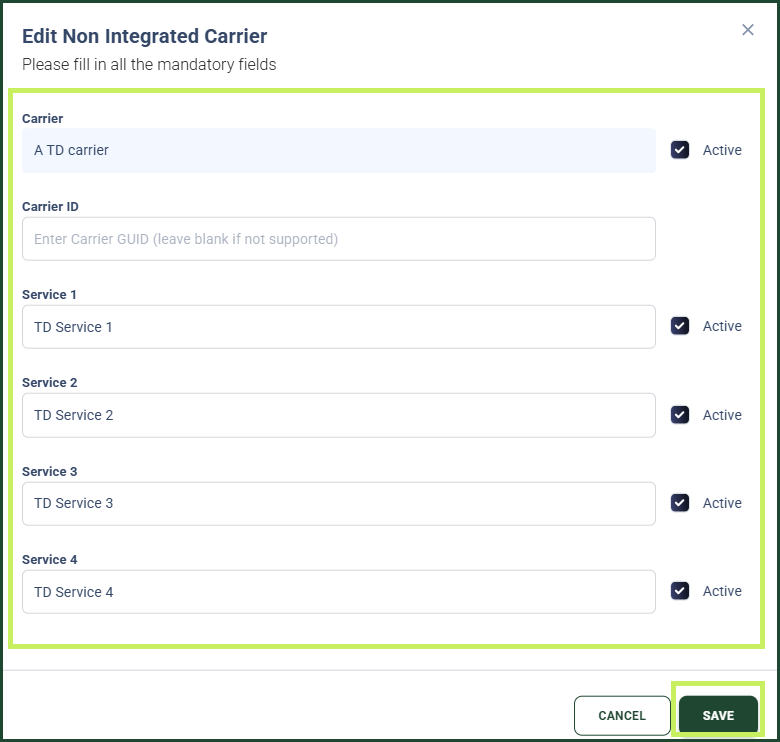
- In the Create Non-Integrated Carrier dialog window, you can edit the following fields:
- Carrier - edit the unique carrier name for the carrier
- Carrier ID - edit the carrier ID of the generic carrier
- Service 1, Service 2, etc. - edit the carrier service name/s for the generic carrier
- Active checkbox - change the status of the carrier and its services
- Click Save.