How to create a non-integrated carrier
Overview
In RMS, creating a non‑integrated carrier gives your operations the flexibility to support shipping methods that are not connected through automated integrations. Using the Non‑Integrated Carriers settings page, authorised users can quickly add a new carrier by entering a unique carrier name and defining one or more service levels. This allows your team to tailor shipping options to your business needs, ensuring continuity and control even when external carrier integrations are unavailable.
How to create a non-integrated carrier
- Log in to Returns Management System (RMS).
- On the sidebar menu, click Settings. A dropdown list of setting properties appears below Settings.
- Click Non-Integrated Carriers. The Settings: Non-Integrated Carriers page appears on the right.
- On the Settings: Non-Integrated Carriers page, click the Create Carrier button.
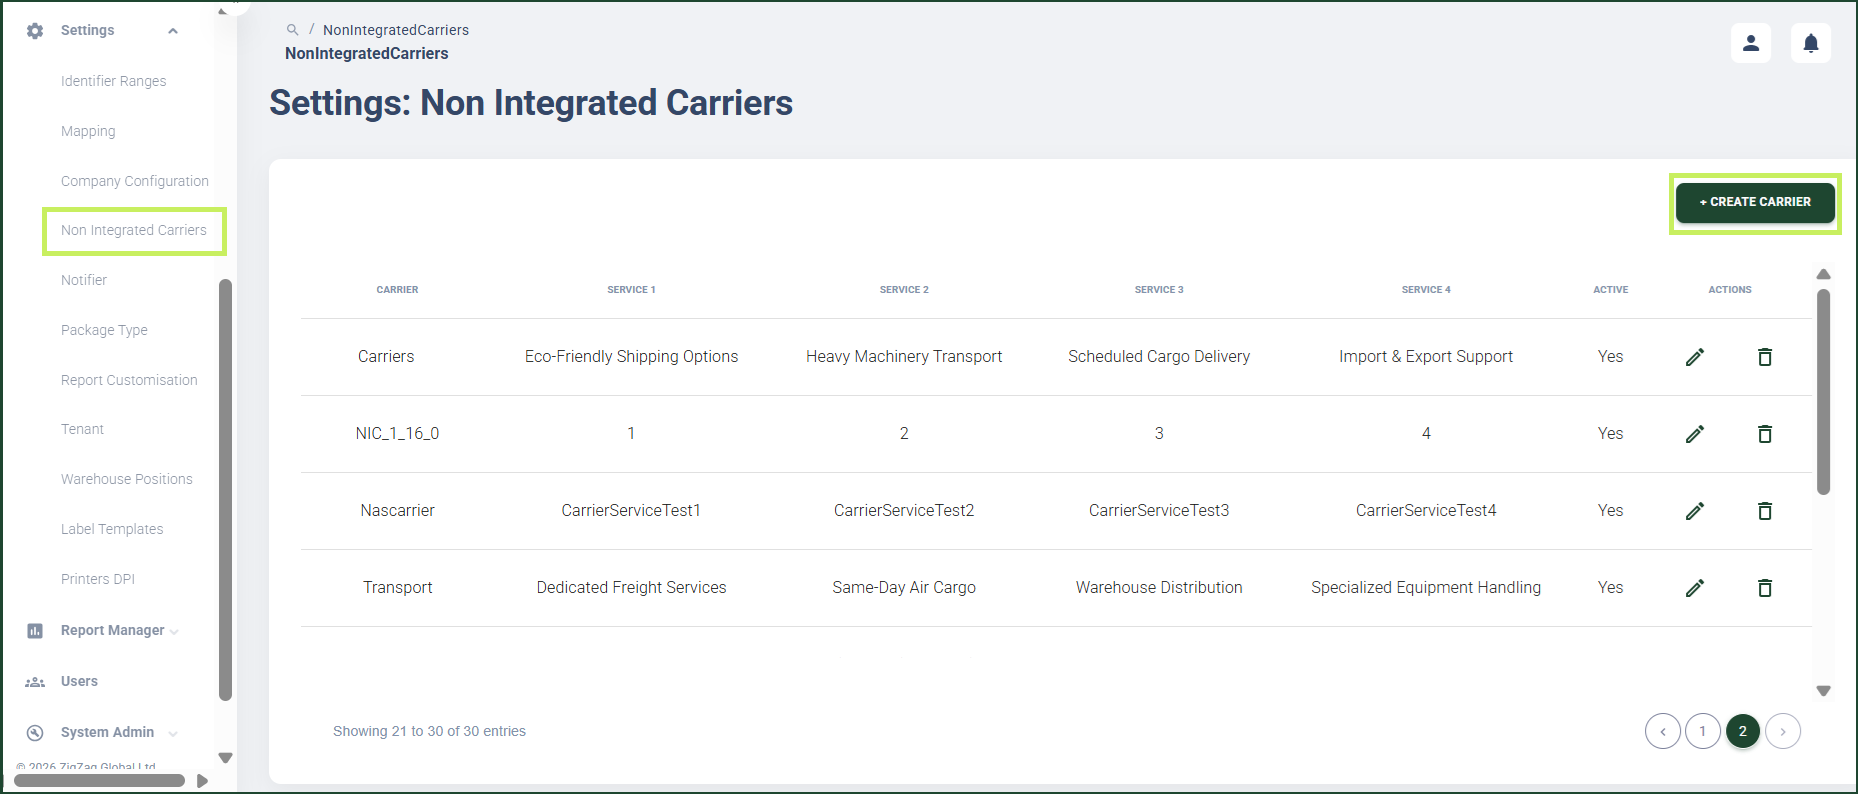
A Create Non-Integrated Carrier dialog window appears.
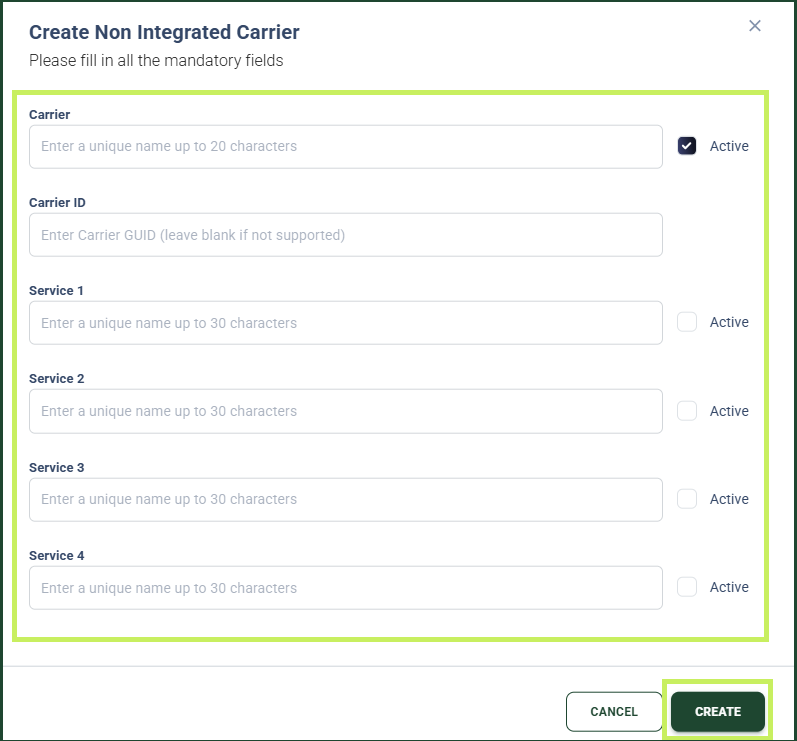
- In the Create Non-Integrated Carrier dialog window, fill in the following fields:
- Carrier - fill in a unique carrier name for the new generic carrier
- Carrier ID - fill in the Carrier ID of the new generic carrier
- Service 1, Service 2, etc. - fill in the carrier service name for the new generic carrier
- Active checkbox - check it to make the carrier and its services active
- Click Create.