How to assign a manifest to a master manifest
Overview
In RMS, assigning a manifest to a master manifest streamlines the consolidation and parcel management process. A manifest represents a group of parcels prepared for dispatch, while a master manifest acts as an overarching container that organizes multiple manifests headed to the same destination or carrier. By assigning individual manifests to a master manifest, you gain a unified view of all related parcels, reduce handling complexity, and ensure smoother downstream logistics activities such as customs processing, carrier collection, and tracking. This relationship not only improves operational efficiency but also enhances traceability across the entire return and dispatch workflow.
How to assign a manifest to a master manifest
- Log in to Returns Management System (RMS).
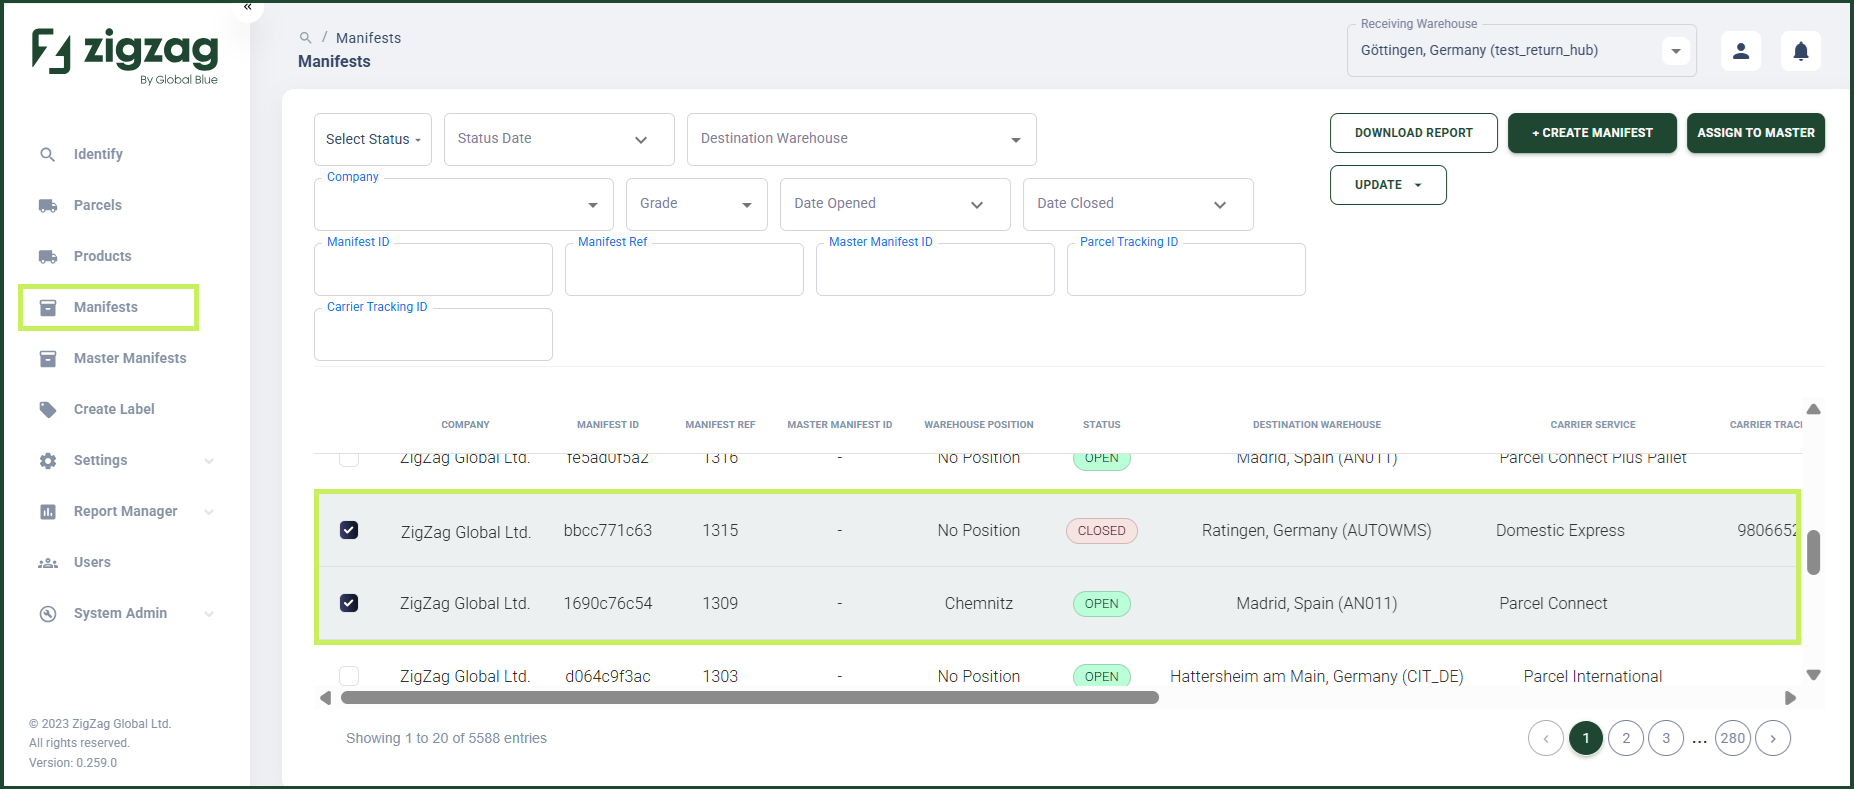
- On the sidebar menu, click Manifests. The Manifests List page appears on the right.
- On the Manifests List page, navigate to the Manifest List table and select the manifests you want to assign to a master manifest by clicking on their respective rows.
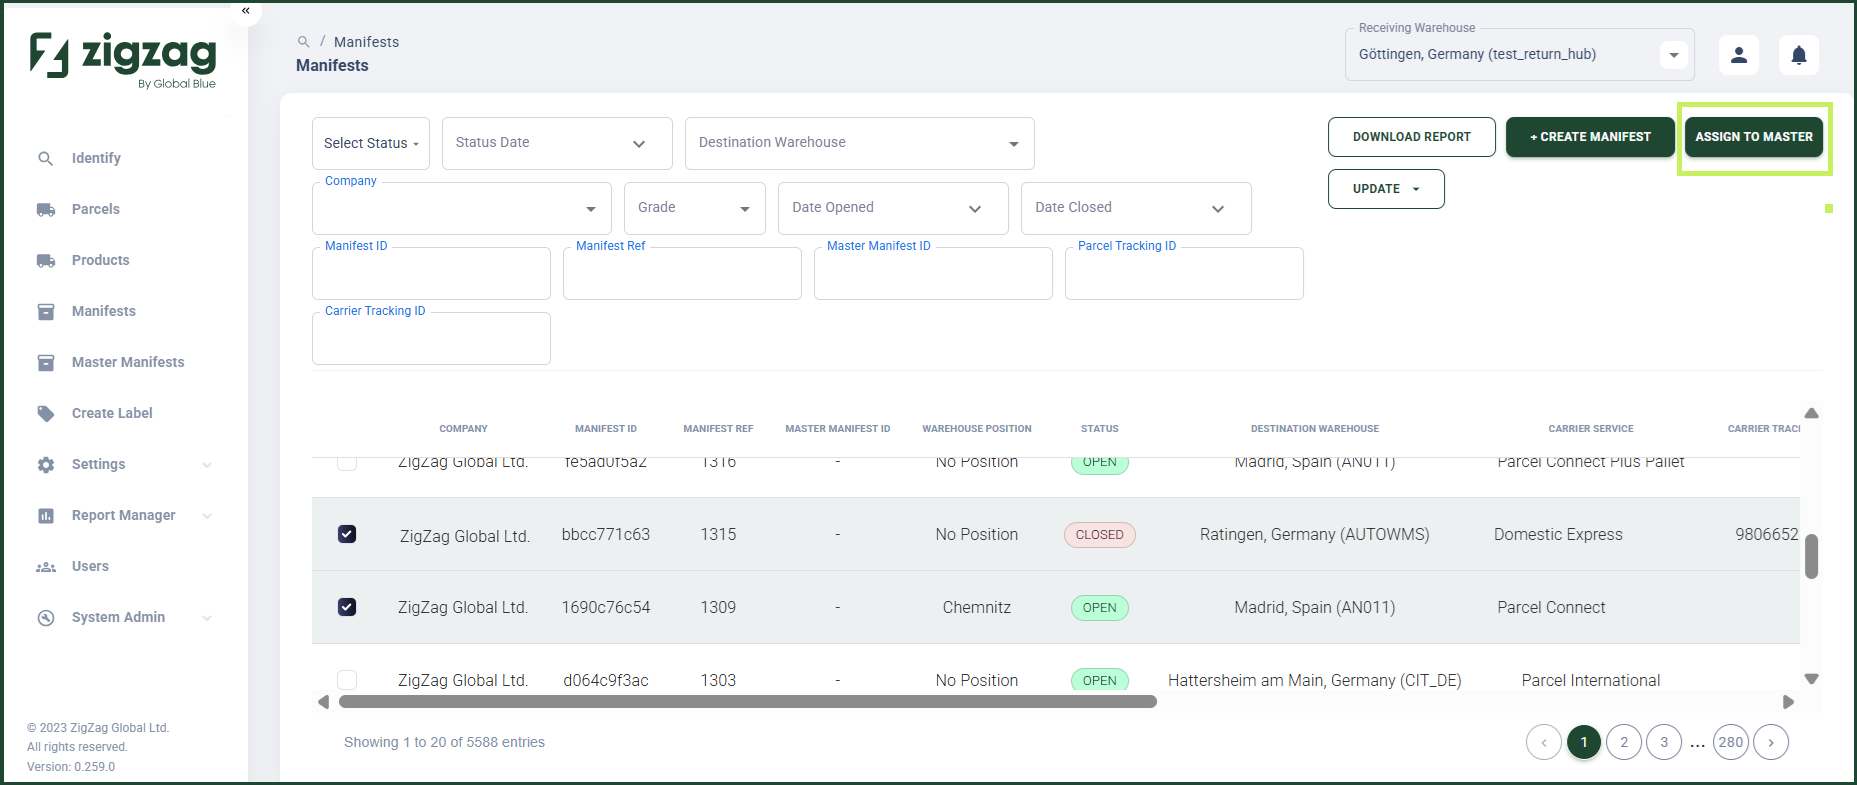
- Click the Assign to Master button. An Assign to Master dialog window appears.
- In the Assign to Master dialog window, you can view a list of the manifests you have selected for assigning to a master manifest.
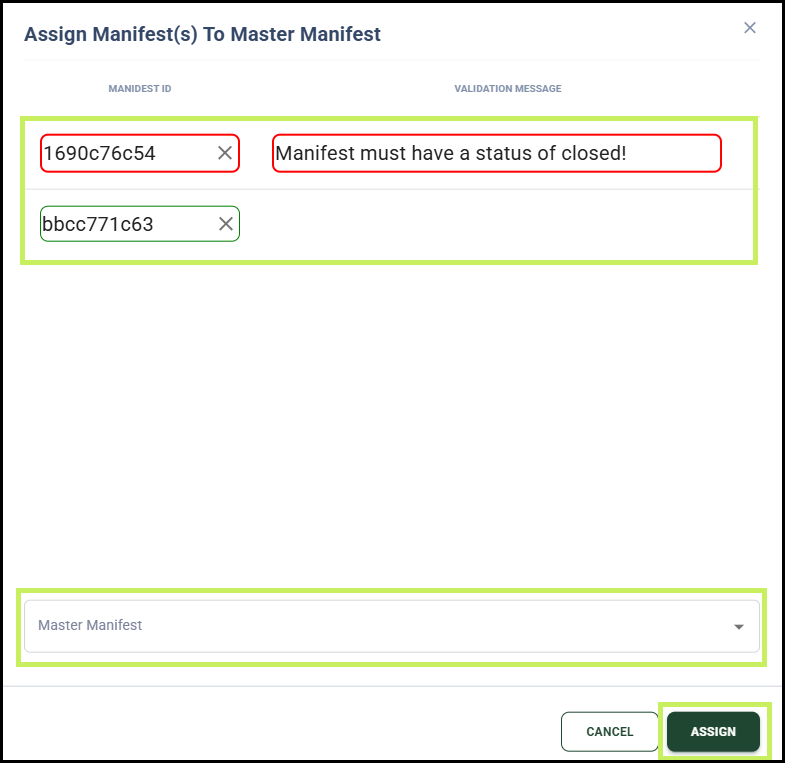
When the manifest status is closed and the manifest is not already assigned to a master manifest, the manifest border is green which means that the manifest is valid for assignment. You can individually remove manifests from the list you see.
- For the manifests which are valid for assignment to a master manifest, from the Master Manifest dropdown menu, select the master manifest you want to assign them to.
- Click Assign.