How to edit a scheduled report
Overview
Editing a scheduled report in RMS Report Manager gives you flexible control over how and when automated reports run, ensuring the report continues to meet evolving operational needs. You can adjust key settings such as activation status, allowing you to pause or resume a report without removing it, and manage its lifecycle through options to delete or re‑enable it as required. These tools provide clear oversight of scheduled activity, helping your team maintain accurate, timely reporting aligned to your internal processes.
How to edit a scheduled report
- Log in to Returns Management System (RMS).
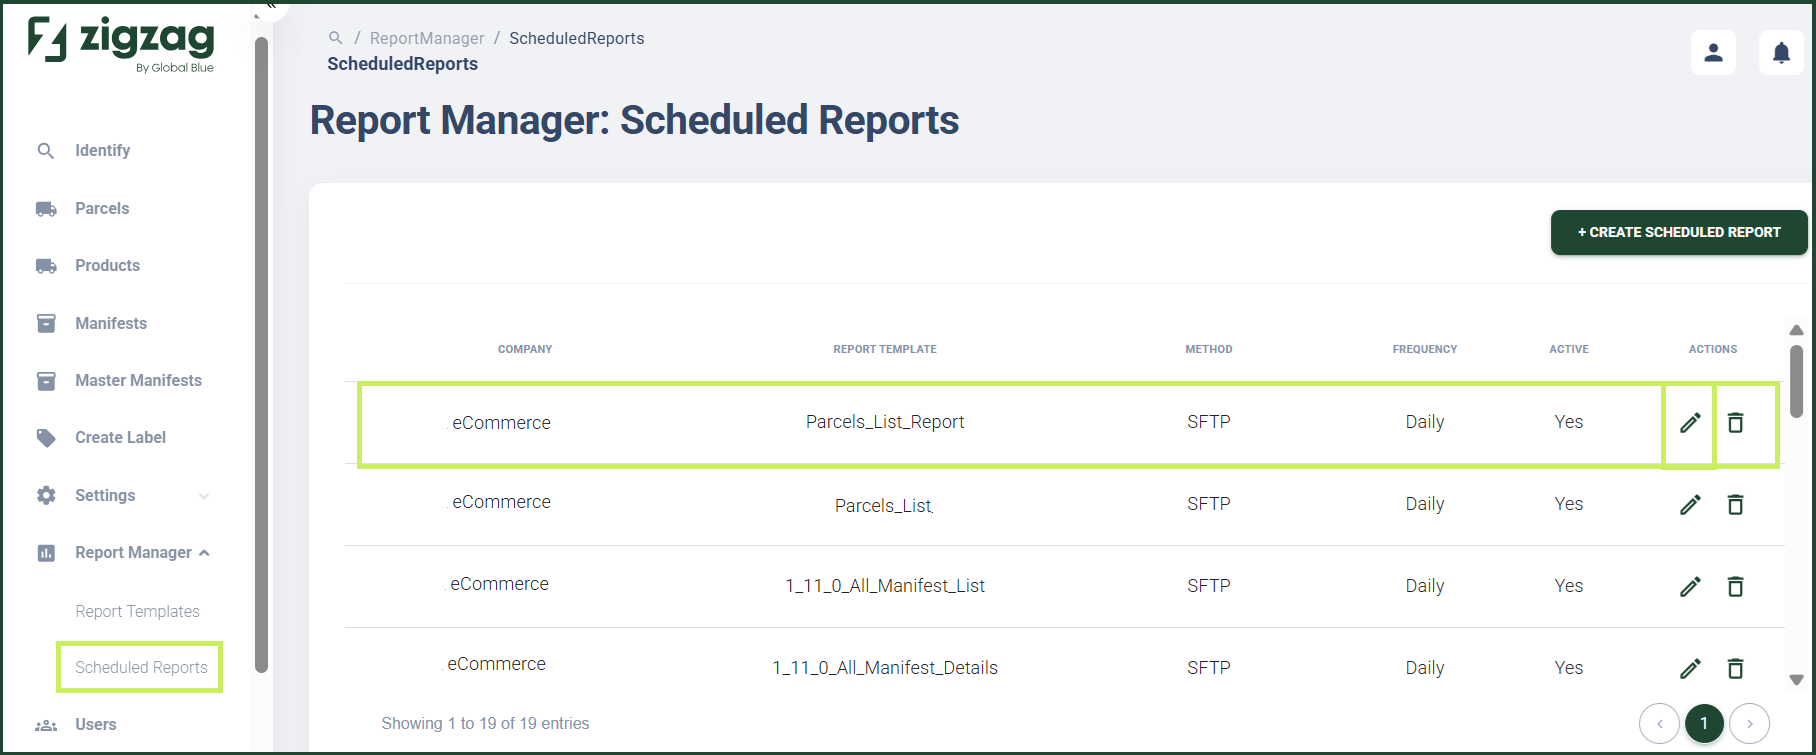
- On the sidebar menu, click Report Manager. A dropdown list of report properties appears below Report Manager.
- Click Scheduled Reports. The Report Manager: Scheduled Reports page appears on the right.
- On the Scheduled Reports page, click the Edit (Pen) icon for the report you want to edit.
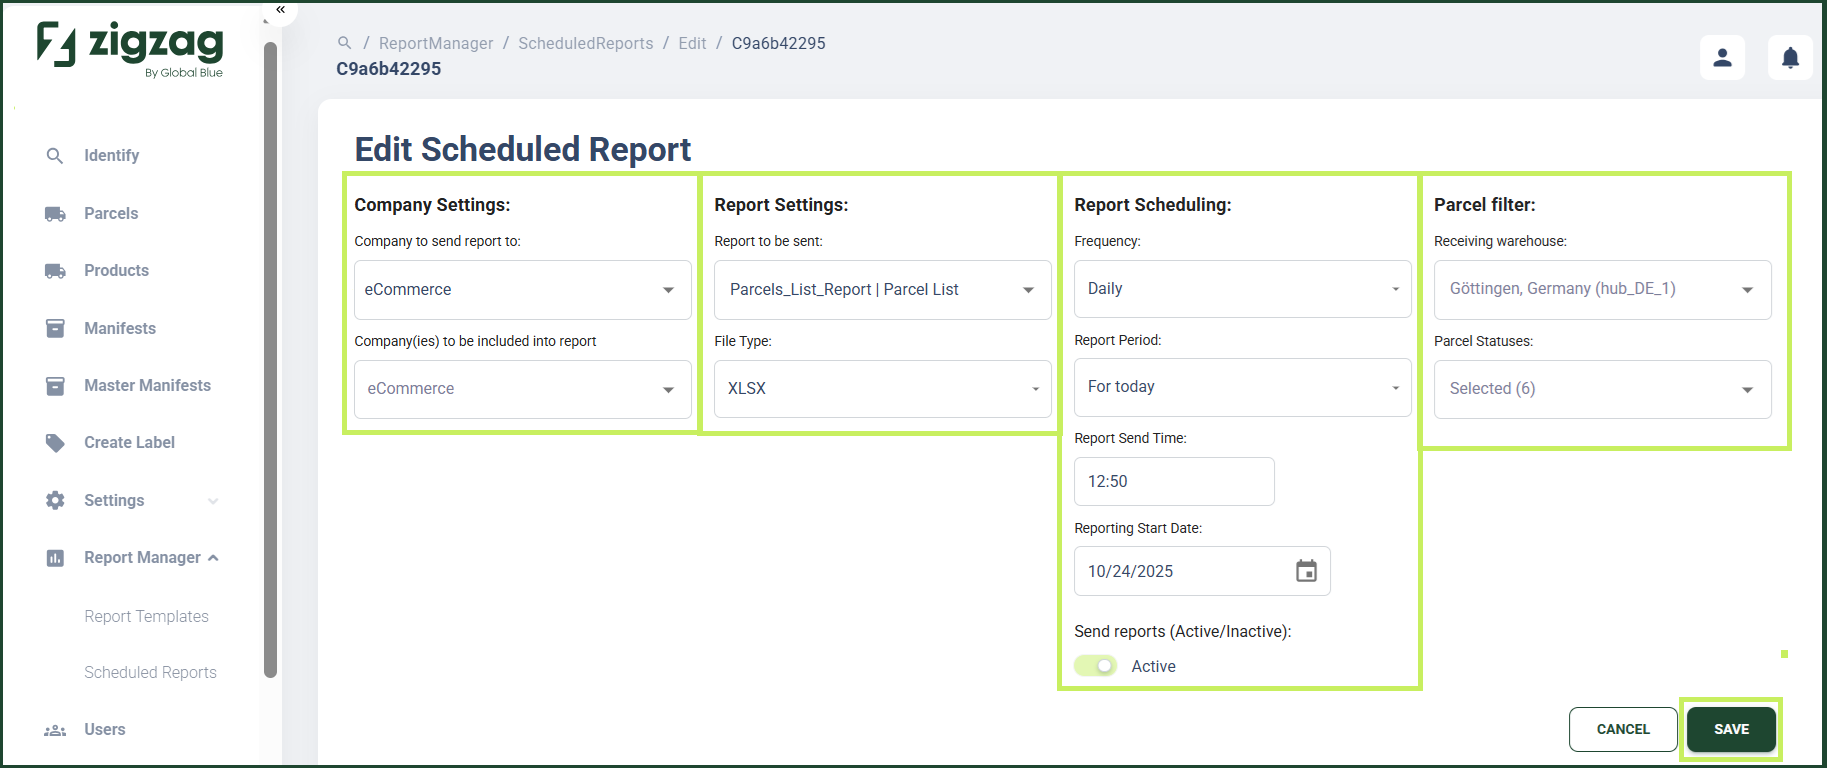
An Edit Scheduled Report dialog window appears.
5. In the Edit Scheduled Report dialog window, you can edit the following fields:
Company settings:
- Company - from the dropdown menu, select the company for which you want to create the report
- Company (ies) - from the dropdown menu, select the company/ies to be included in the report
Report settings: - Report to be sent - from the dropdown menu, select the name of the report template to be scheduled
- File type - from the dropdown menu, select the file type in which the report is downloaded
Report scheduling: - Frequency - from the dropdown menu, select the frequency at which you want the report to be sent
- Report Period - from the dropdown menu, select the period you want the report to cover
- Report Send Time - edit the time of the day you want the report to be sent
- Report Start Date - from the calendar picker, edit the start date on which you want the report to be sent
- Send Report (Active/Inactive) - via the toggle, edit whether the report is active or not
Parcel filters: - Receiving Warehouse - from the dropdown menu, select the receiving warehouse for which the report is sent
- Parcel Statuses - from the dropdown menu, select the parcel statuses to be included in the report
- Click Save.