How to create a custom report
Overview
Creating custom reports in the RMS Report Manager gives your team a simple, flexible way to generate exactly the insights you need. Through an intuitive interface, you can choose a report type, select the data fields that matter most to your business, and tailor the layout to match your internal terminology and workflows. Once created, these reports become readily available for download or automation, helping you access consistent, accurate data whenever you need it—without any technical overhead.
How to create a custom report
- Log in to Returns Management System (RMS).
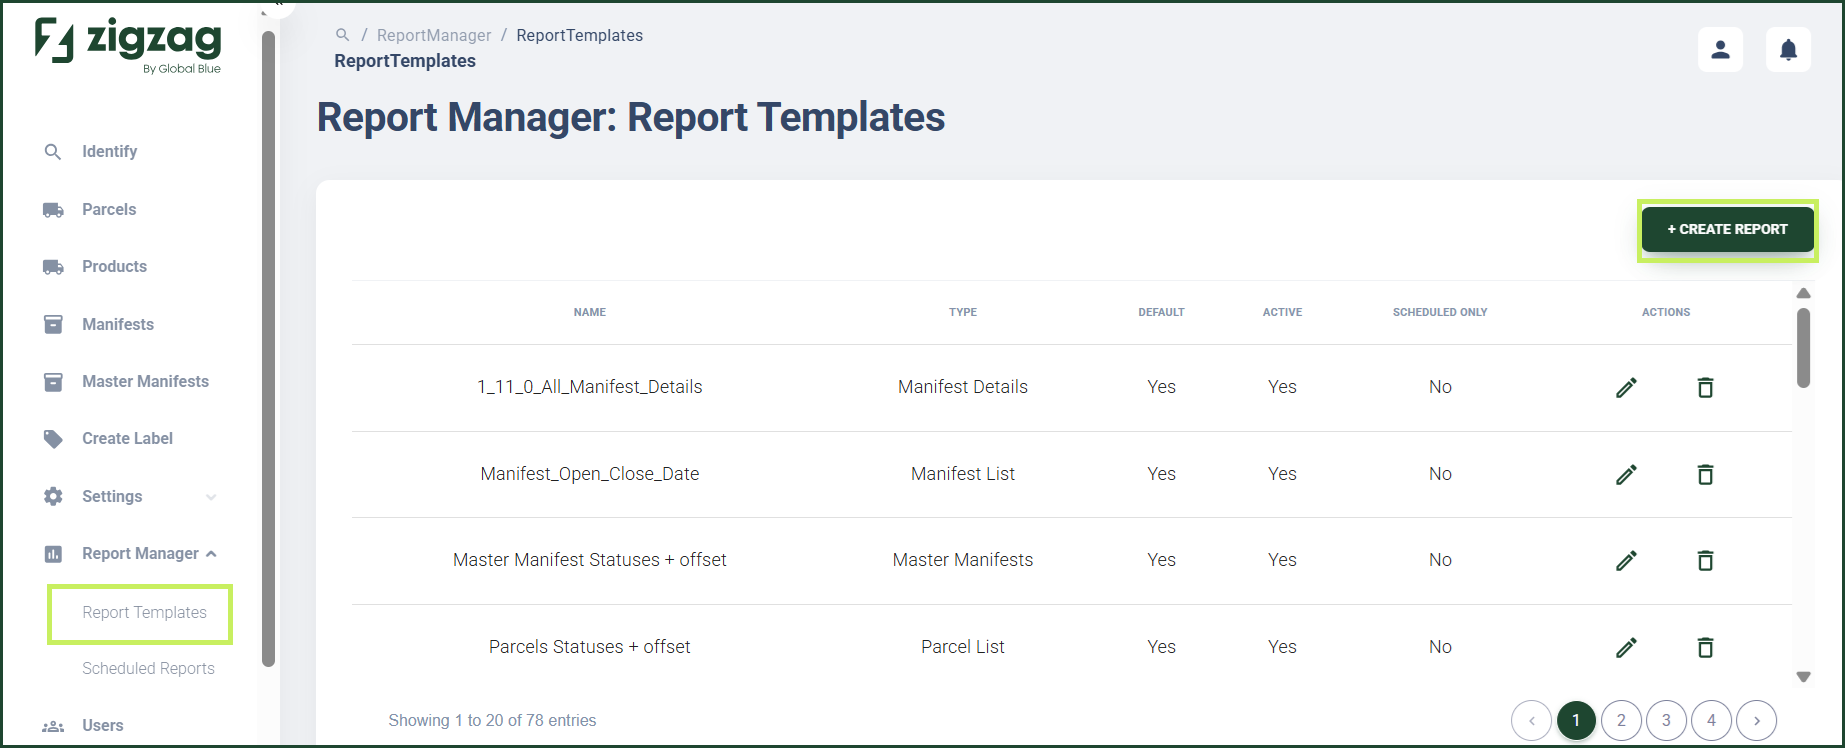
- On the sidebar menu, click Report Manager. A dropdown list of report properties appears below Report Manager. Click Report Templates. The Report Manager: Report Templates appears on the right.
- Click Create report button on the top right side of the page.
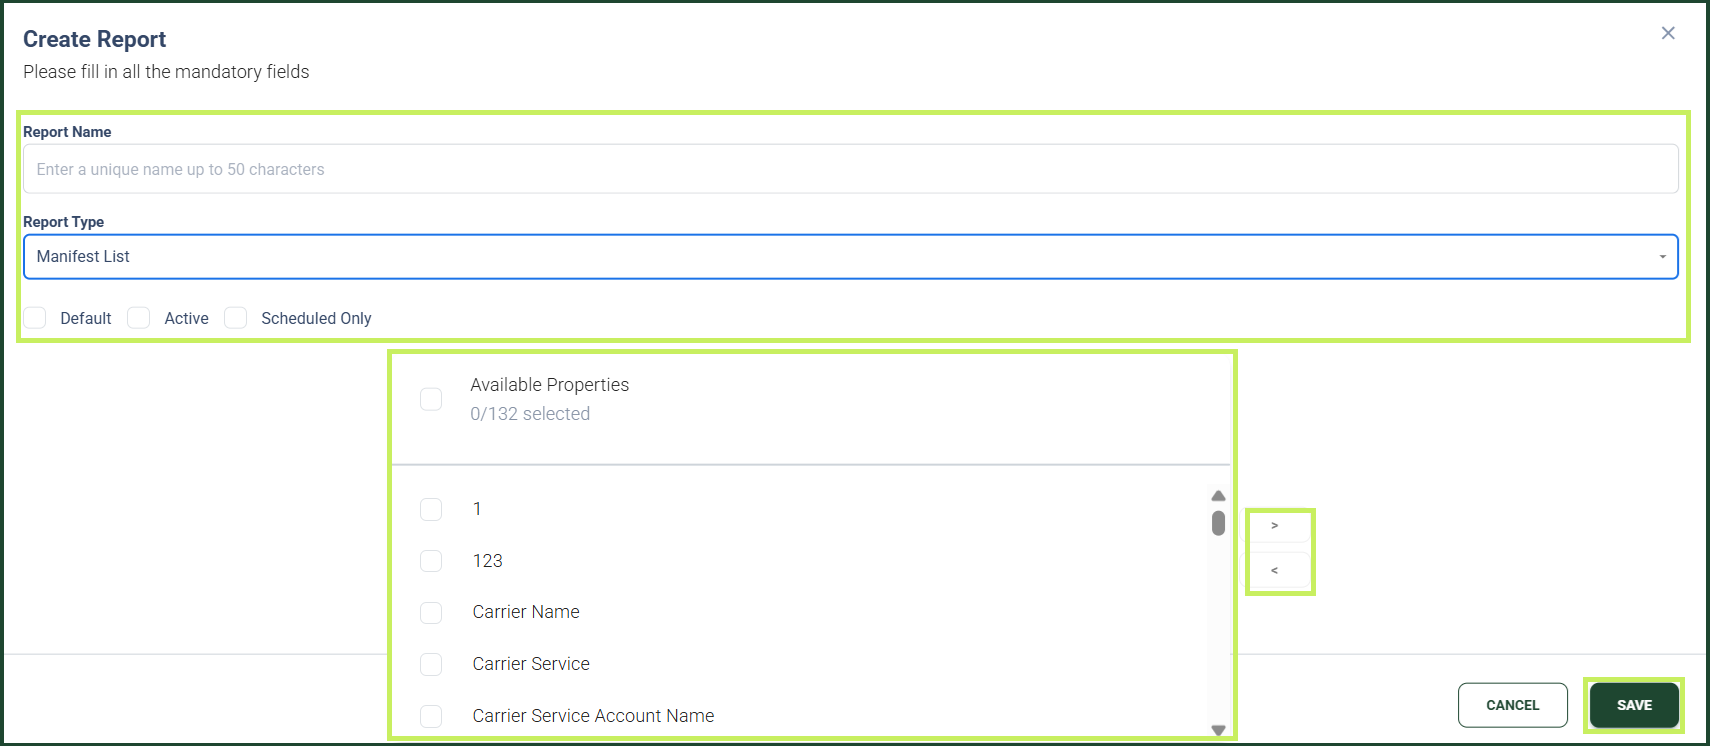
A Create report dialog window appears.
4. In the Create report dialog, fill in the following fields:
- Report Name - fill in the name of the new report
- Report Type - from the drop-down menu, select the report type for the new custom report
- Default - click the Default radio button if you want the report to be a default one when downloaded
- Active - click the Active radio button if you want the report to be available to the RMS users
- Scheduled only - click the Scheduled only radio button if you want the report to be generated and sent at defined intervals by RMS scheduler and not be available for manual download
- Available/Selected properties - select the properties you want the custom report to contain by clicking on them in the Available properties list and then click the right-pointed Arrow icon to move them to the Selected properties list. You can move report properties from the list of Selected one back to the list of Available ones by clicking on them and then selecting the left-pointed Arrow icon.
- Click Save.