How to create a scheduled report
Overview
Creating scheduled reports in RMS Report Manager allows you to automatically generate and deliver recurring reports at predefined intervals, ensuring timely access to key operational insights. The Scheduled Reporting feature enables configuration of report type, output destination, and frequency, giving you full control over when and how reports are produced. You can easily activate, pause, or delete scheduled reports as needed, ensuring that only relevant and up‑to‑date information is shared across your organisation.
How to create a scheduled report
- Log in to Returns Management System (RMS).
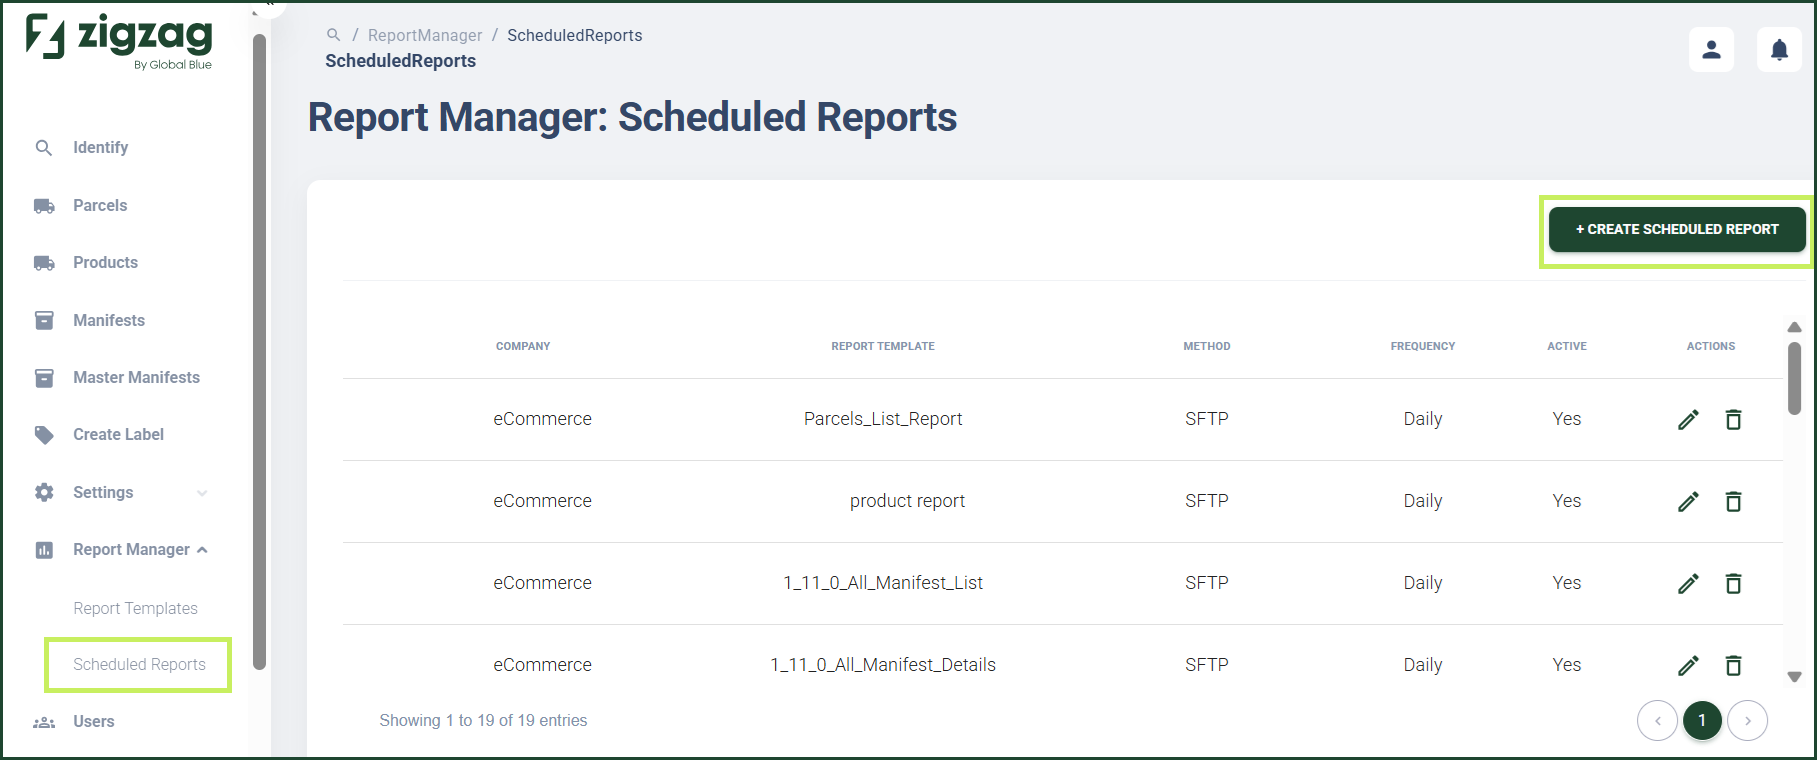
- On the sidebar menu, click Report Manager. A dropdown list of report properties appears below Report Manager.
- Click Scheduled Reports. The Report Manager: Scheduled Reports page appears on the right.
- On the Scheduled Reports page, click the Create Scheduled Report button.
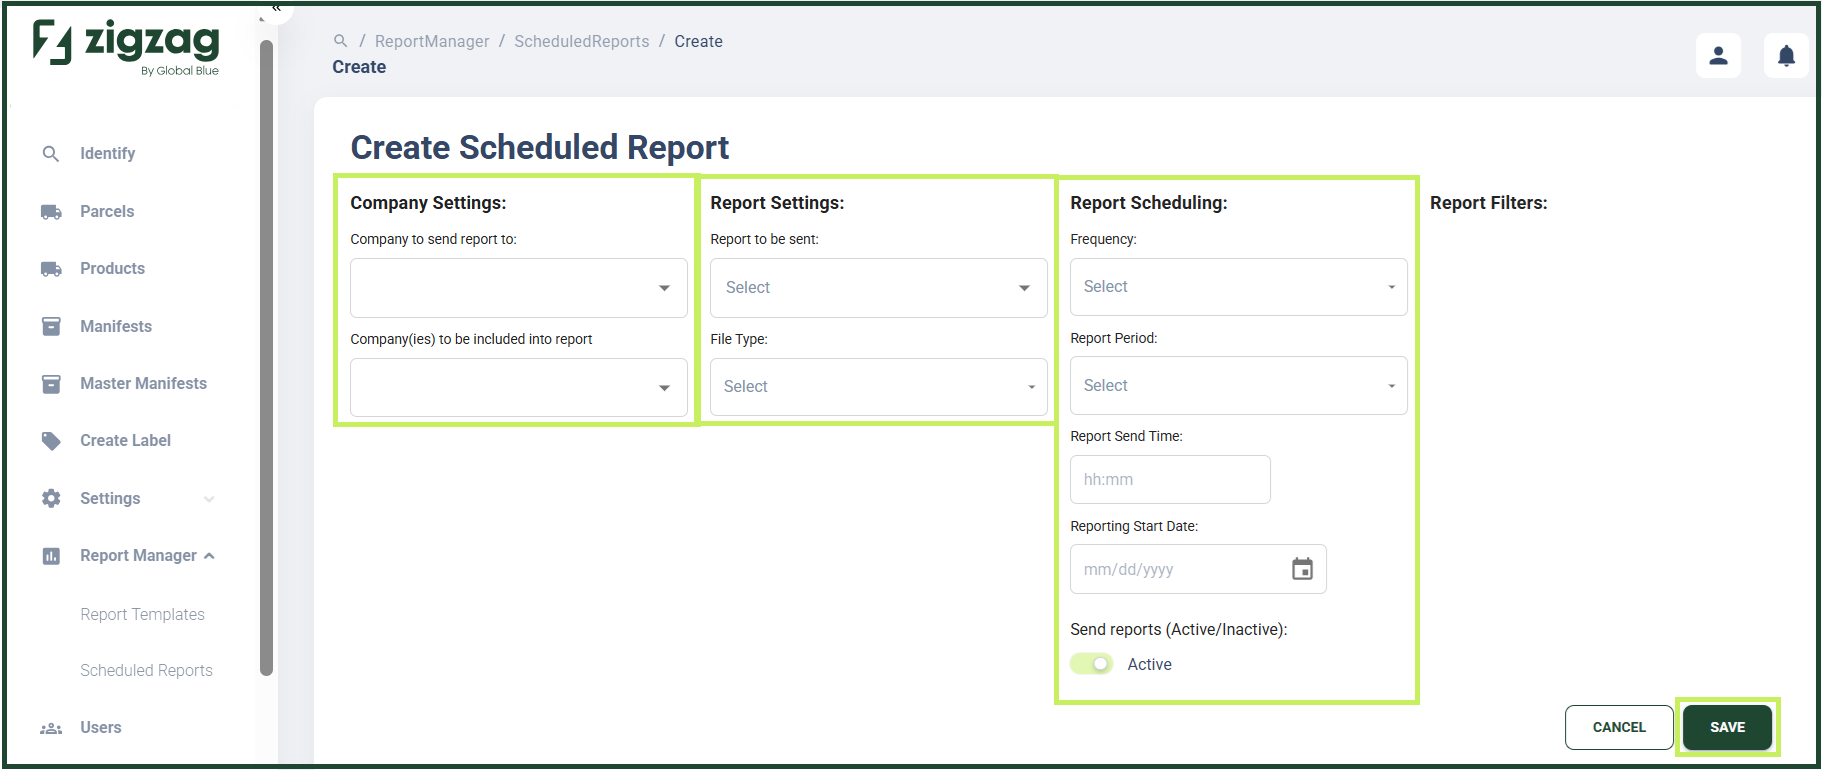
A Create Scheduled Report dialog window appears.
5. In the Create Scheduled Report dialog window, fill in the following fields:
Company settings:
- Company - from the dropdown menu, select the company for which you want to create the report
- Company (ies) - from the dropdown menu, select the company/ies to be included in the report
Report settings:
- Report to be sent - from the dropdown menu, select the name of the report template to be scheduled
- File type - from the dropdown menu, select the file type in which the report is downloaded
Report scheduling:
- Frequency - from the dropdown menu, select the frequency at which you want the report to be sent
- Report Period - from the dropdown menu, select the period you want the report to cover
- Report Send Time - fill in the time of the day you want the report to be sent
- Report Start Date - from the calendar picker, select the start date on which you want the report to be sent
- Send Report (Active/Inactive) - via the toggle, select whether the report is active or not
Report filters:
Depending on the type of report, you will be presented with different types of filters for this section.
For Parcel List report
- Receiving Warehouses - from the dropdown menu, select the receiving warehouse for which the report is sent
- Parcel Statuses - from the dropdown menu, select the parcel statuses to be included in the report
For Product List report
- Receiving Warehouses - from the dropdown menu, select the receiving warehouse for which the report is sent
For Manifest List report, Manifest Details report and Master Manifest List report:
- Receiving Warehouses - from the dropdown menu, select the receiving warehouse for which the report is sent
- Manifest Statuses - from the dropdown menu, select the manifest statuses to be included in the report
- Click Save.