How to edit a custom report
Overview
Editing custom reports in the RMS Report Manager makes it easy to keep your reporting aligned with your evolving operational needs. Using a simple, guided interface, you can update a report’s name, adjust its type, enable or disable it for your team, and fine‑tune the data it includes by adding and removing report fields. Whether you’re refining terminology, expanding visibility, or tailoring outputs for different stakeholders, RMS ensures your reports remain accurate, relevant, and fully in your control.
How to edit a custom report
- Log in to Returns Management System (RMS).
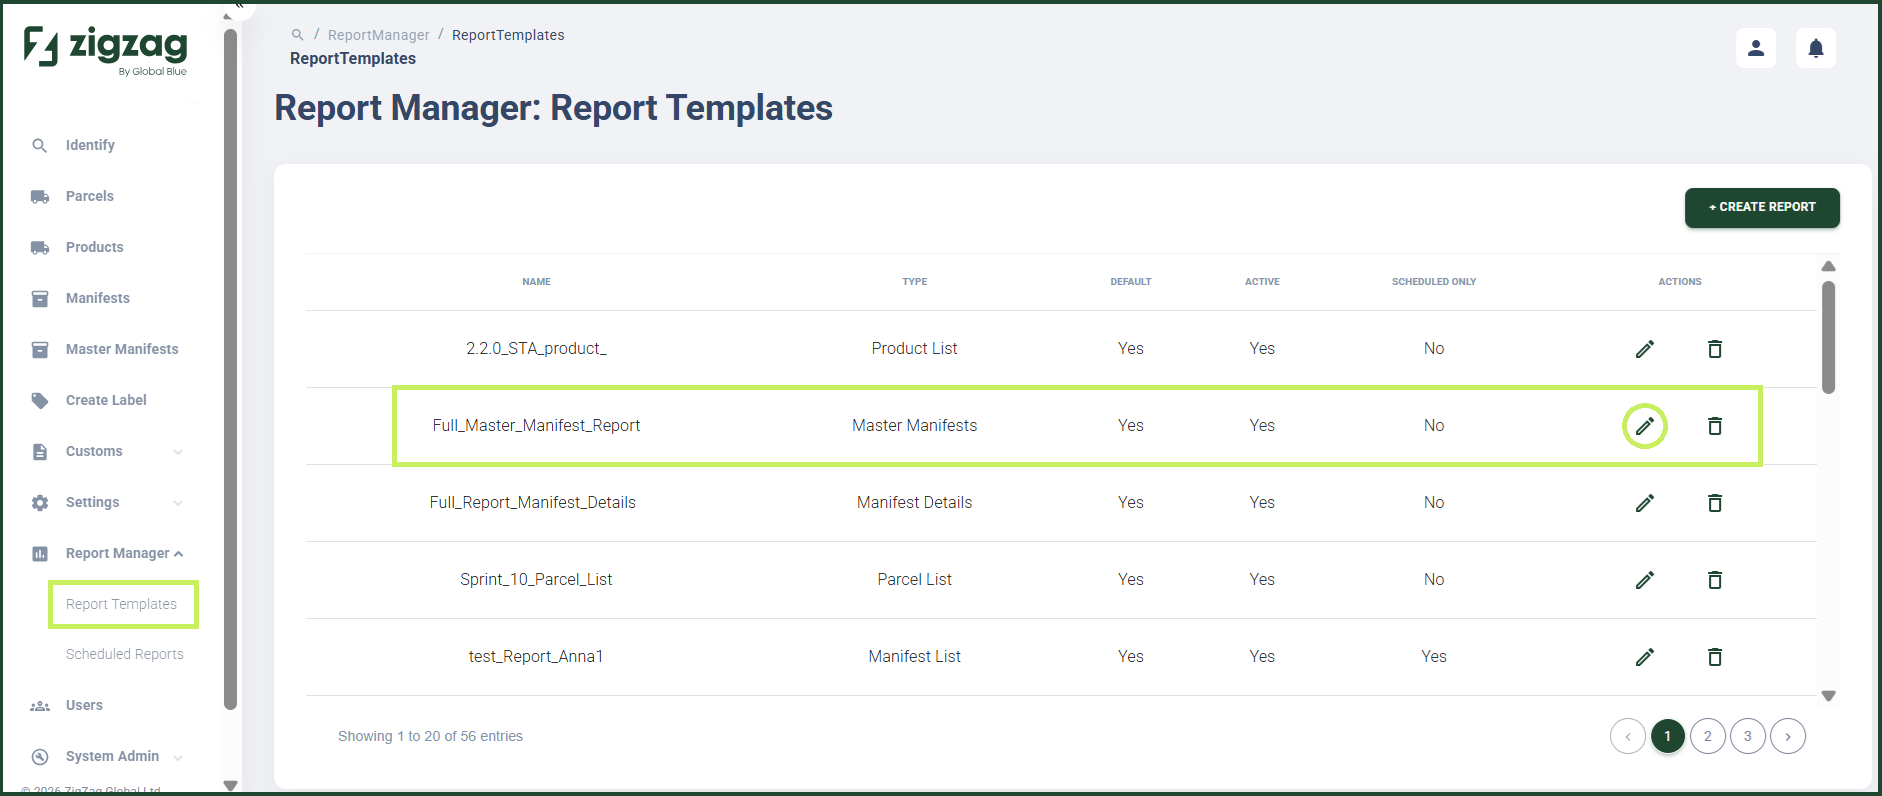
- On the sidebar menu, click Report Manager. A dropdown list of report properties appears below Report Manager.
- Click Report Templates. The Report Manager: Report Templates page appears on the right.
- Click the Edit (Pen) icon for the custom report you want to edit.
An Edit report dialog window appears.
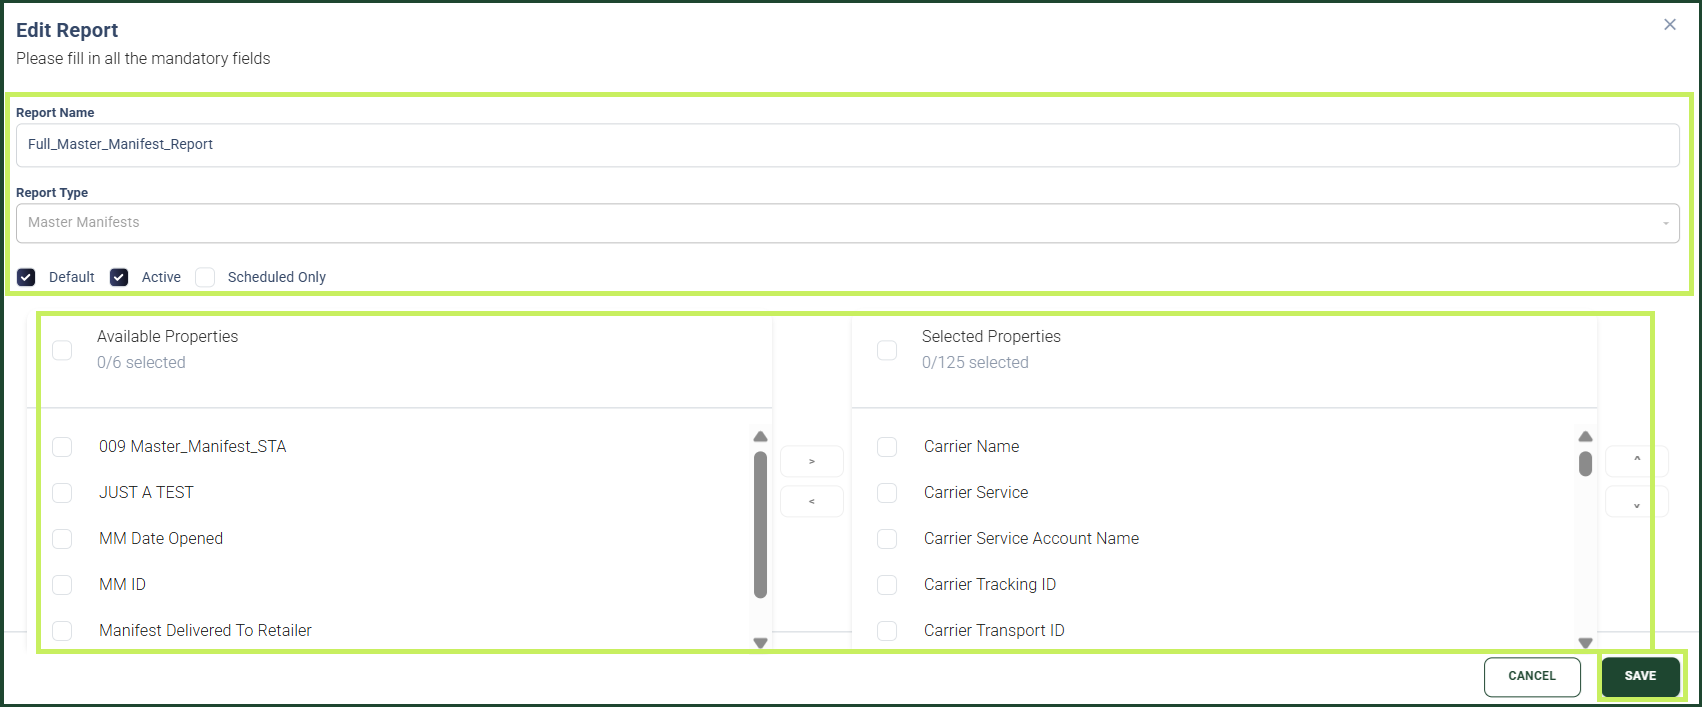
4. In the Edit report dialog, you can edit the following fields:
- Report Name - edit the name of the report
- Report Type - from the drop-down menu, edit the report type for the custom report
- Default - click the Default checkbox if you want the report to be a default one when downloaded
- Active - click the Active checkbox if you want the report to be available to the RMS users
- Scheduled only - click the Scheduled only checkbox if you want the report to be generated and sent at defined intervals by RMS scheduler and not be available for manual download
- Available/Selected properties - select the properties you want the custom report to contain by clicking on them in the Available properties list and then click the right-pointed Arrow icon to move them to the Selected properties list. You can move report properties from the list of Selected one back to the list of Available ones by clicking on them and then selecting the left-pointed Arrow icon.
- Click Save.