How to process a parcel via Consolidate workflow
Overview
Consolidation is the process of grouping multiple returned items into a single shipment before sending them to a retailer, warehouse, or a resale location. This approach significantly reduces shipping costs, processing time, and environmental impact.
RMS supports intra-EU and intra-national shipments with minimal or no product data. These returns can be identified, processed and tracked with the same level of traceability and reporting as standard parcels.
How to process a parcel via Consolidate workflow
When 'Actual Gross Weight' is disabled in the tenant settings, the 'Auto Confirm' toggle is active in the Consolidate workflow, and a parcel's warehouse operation is 'Consolidate', the system automatically confirms the parcel without requiring manual action. As a result, the date is populated and the Confirm button is disabled.
Assign Parcel page
- After a parcel has been identified for consolidation, you are navigated to the Assign Parcel page. Under the name of the page, you can see parcel details such as:
- the destination warehouse where the parcel needs to be delivered;
- the actual weight of the parcel in kilograms;
- the company to which the parcel belongs.
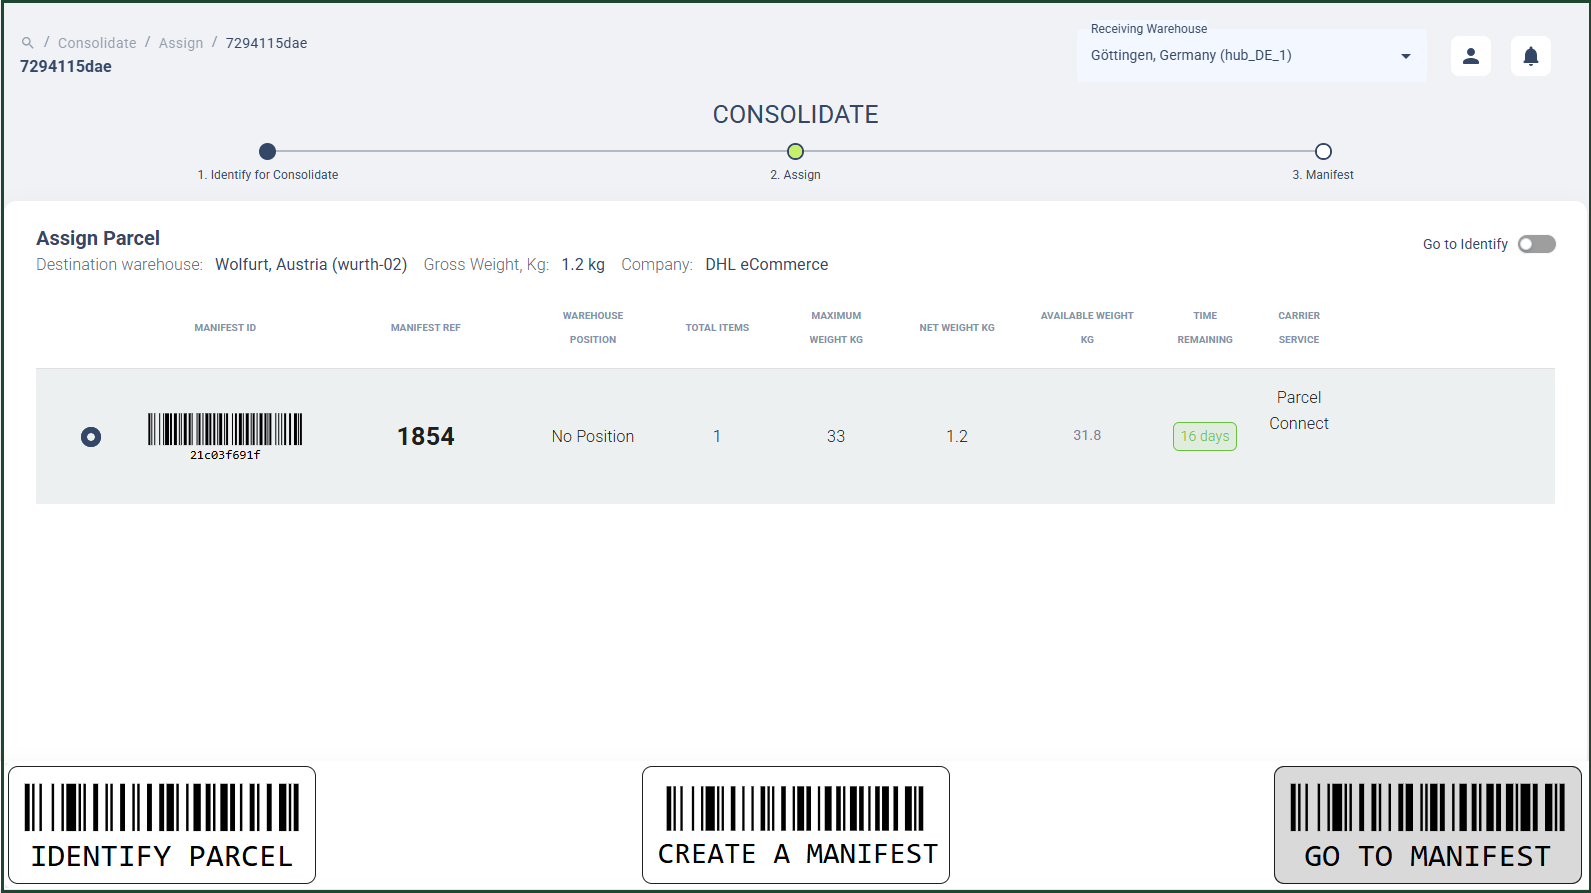
- In the Manifest list table on the Assign Parcel page, you can select a manifest appropriate for the parcel you have identified by clicking on the manifest row.
- After selecting the manifest, click the Go to Manifest button to open the manifest you have selected. You will be navigated to the Manifest page.
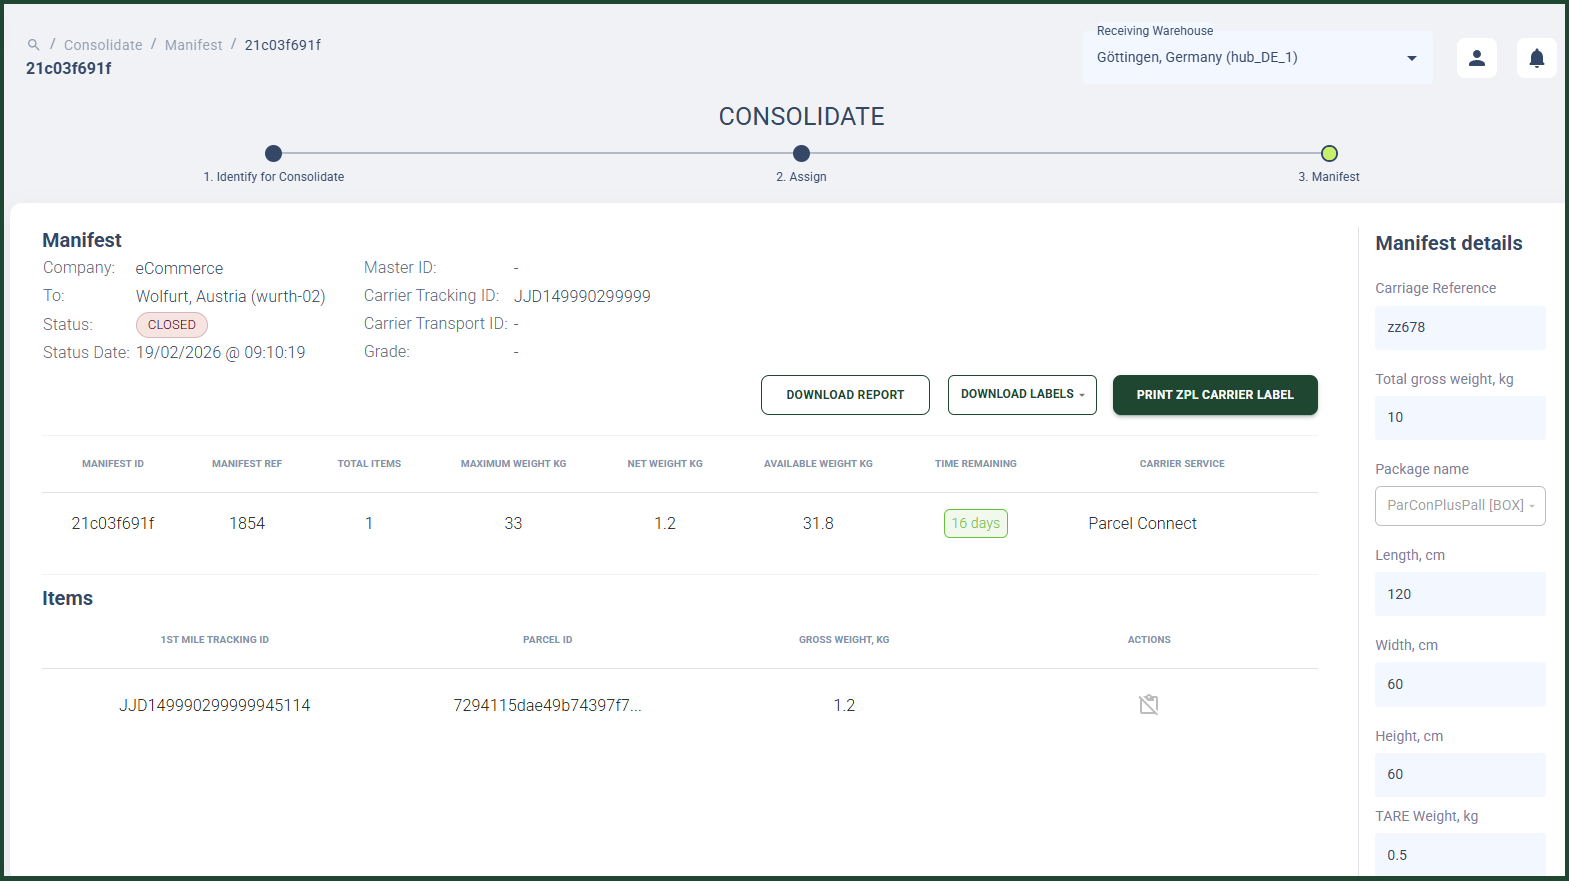
- If you can not find an appropriate manifest for the parcel you have identified, you can create a new manifest by clicking the Create Manifest button. A Create Manifest dialog window appears.
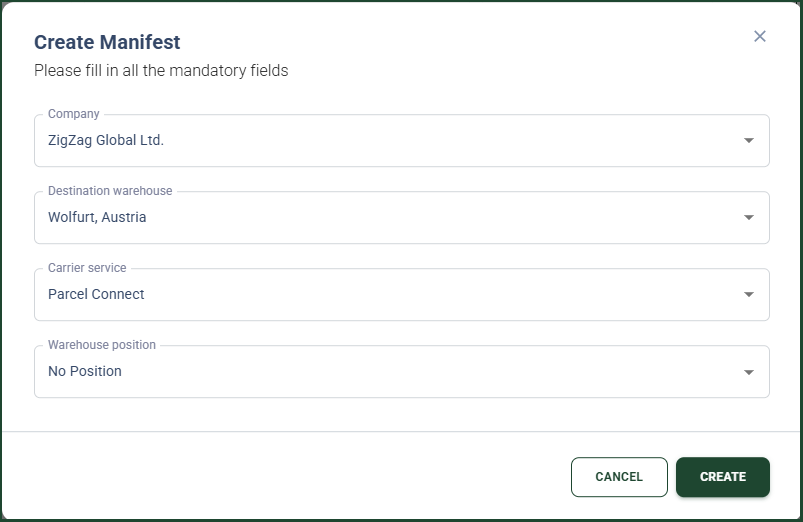
- In the Create Manifest dialog, fill in the following fields:
- Company - select the company for the new manifest from the drop-down list of companies
- Destination warehouse - select the carrier service for the new manifest from the drop-down list of destination warehouses
- Carrier Service - select the carrier service for the new manifest from the drop-down list of carrier services
- Warehouse Position - select a warehouse position from the drop-down list of positions; RMS automatically assigns the first possible position to the manifest but this can be overridden by your selection
- Click Create. You will be navigated to the Manifest page.
Manifest page
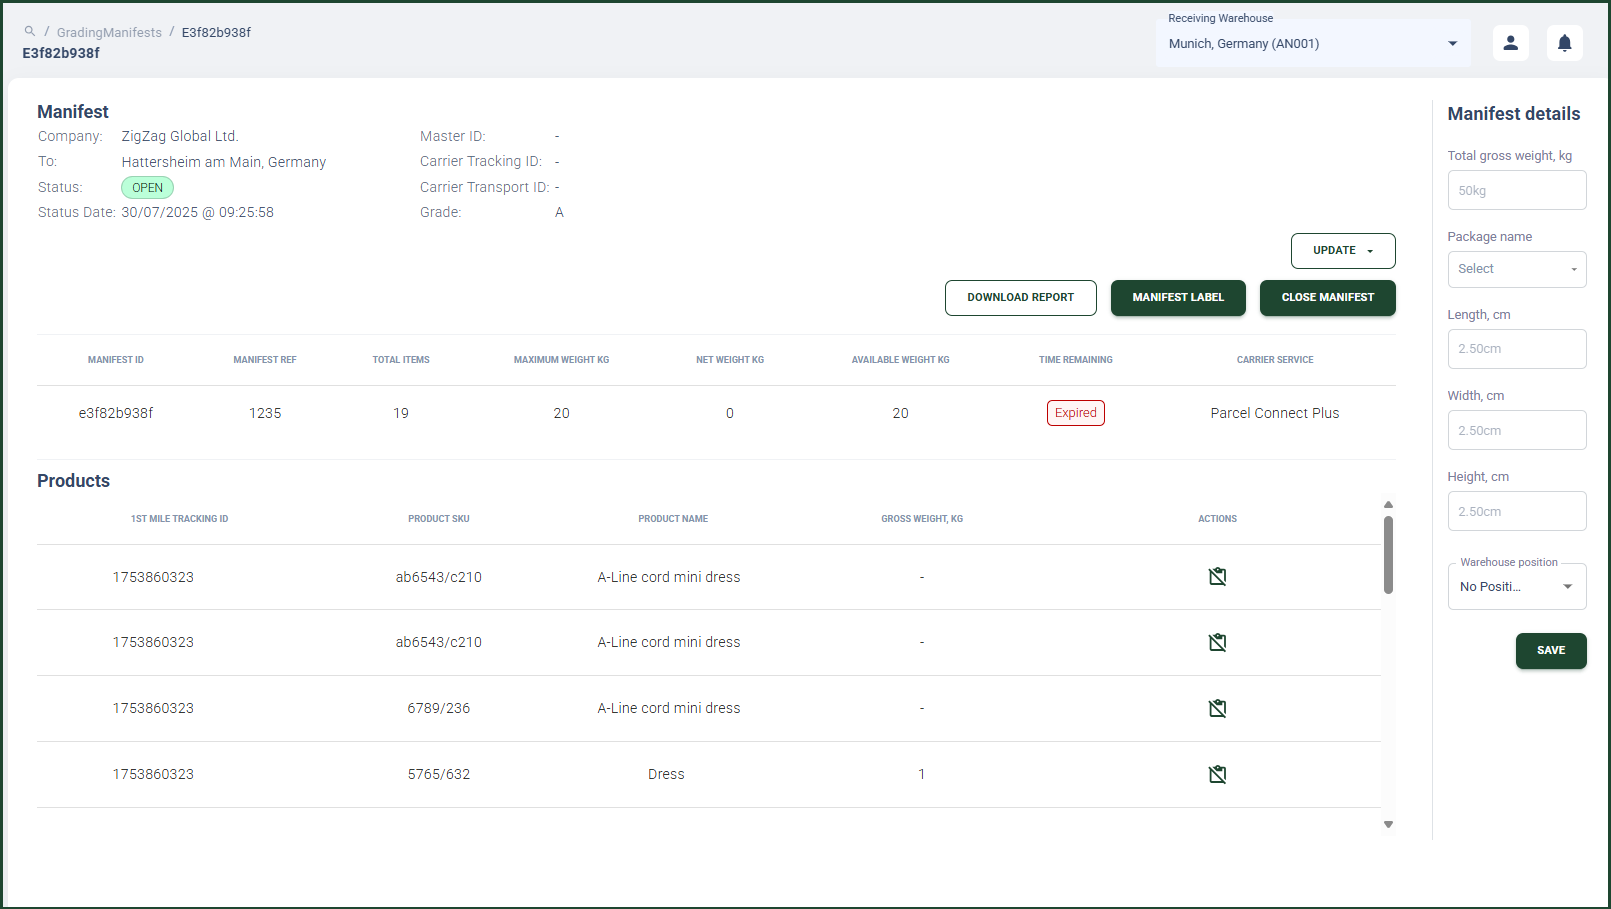
- On the Manifest page, you can see the following sections with relevant information:
- Manifest information section with details on:
- Company
- (To) Destination Warehouse
- Status
- Status Date
- Master ID
- Carrier Tracking ID
- Carrier Transport ID
- Grade
- Manifest table section with details on:
- Manifest ID
- Manifest Reference Number
- Total number of items in the manifest
- Maximum manifest weight in kilograms
- Net weight in kilograms
- Available weight in kilograms - this is the difference between the maximum manifest weight and the current weight of all the parcels assigned to the manifest
- Time remaining - this is the time that is left before you have to close the manifest
- Carrier Service
- Products table section with details on:
- 1st Mile Tracking ID - this is the parcel tracking number
- Product SKU
- Product name
- Gross weight in kilograms - this is the actual weight of the parcel
- Remove item icon button - the button allows you to remove a parcel from the manifest
- Manifest information section with details on:
- To see a Manifest Details report, click the Download Report button. The Manifest Details report will be downloaded on your device.
- To close the manifest, click the Close Manifest button. When closing a Manifest, RMS automatically generates and prints a Carrier Label*.
- To download the manifest label, click the Download PDF label button.
- To print the manifest label, click the Print ZPL label button.
*Automation of printing is subject to configuration.