How to process a parcel via Grade and Consolidate workflow
Overview
Grading assesses the condition of an item based on retailer-specific criteria. RMS Grading aligns seamlessly with retailer-specific standards and dynamically manages consolidated return manifests.
Consolidation is the process of grouping multiple returned items into a single shipment before sending them to a retailer, warehouse, or a resale location. This approach significantly reduces shipping costs, processing time, and environmental impact.
This page guides you on how to process a parcel via RMS Grade and Consolidate workflow.
There are two prerequisites for any warehouse user to be able to complete the Grade and Consolidate workflow:
- Grade and consolidate warehouse operation must be activated for the tenant. This is done in the back-end.
- A mapping containing the Grade and Consolidate warehouse operation must be activated in the RMS Settings: Mapping tab.
When the 'Auto Confirm' toggle is active in the Grade & Consolidate workflow and 'Actual Gross Weight' is disabled in the Tenant settings, RMS automatically confirms the parcel without requiring manual action. As a result of the automatic confirmation, the date is populated, and the Confirm button is disabled. However, in case you select the stepper icons, the system ignores automatic toggles, and you can navigate to Identify for Grade & Consolidate using the stepper and remain on the page until you manually change the page using the stepper.
How to process a parcel via Grade and Consolidate workflow
Parcel Details page
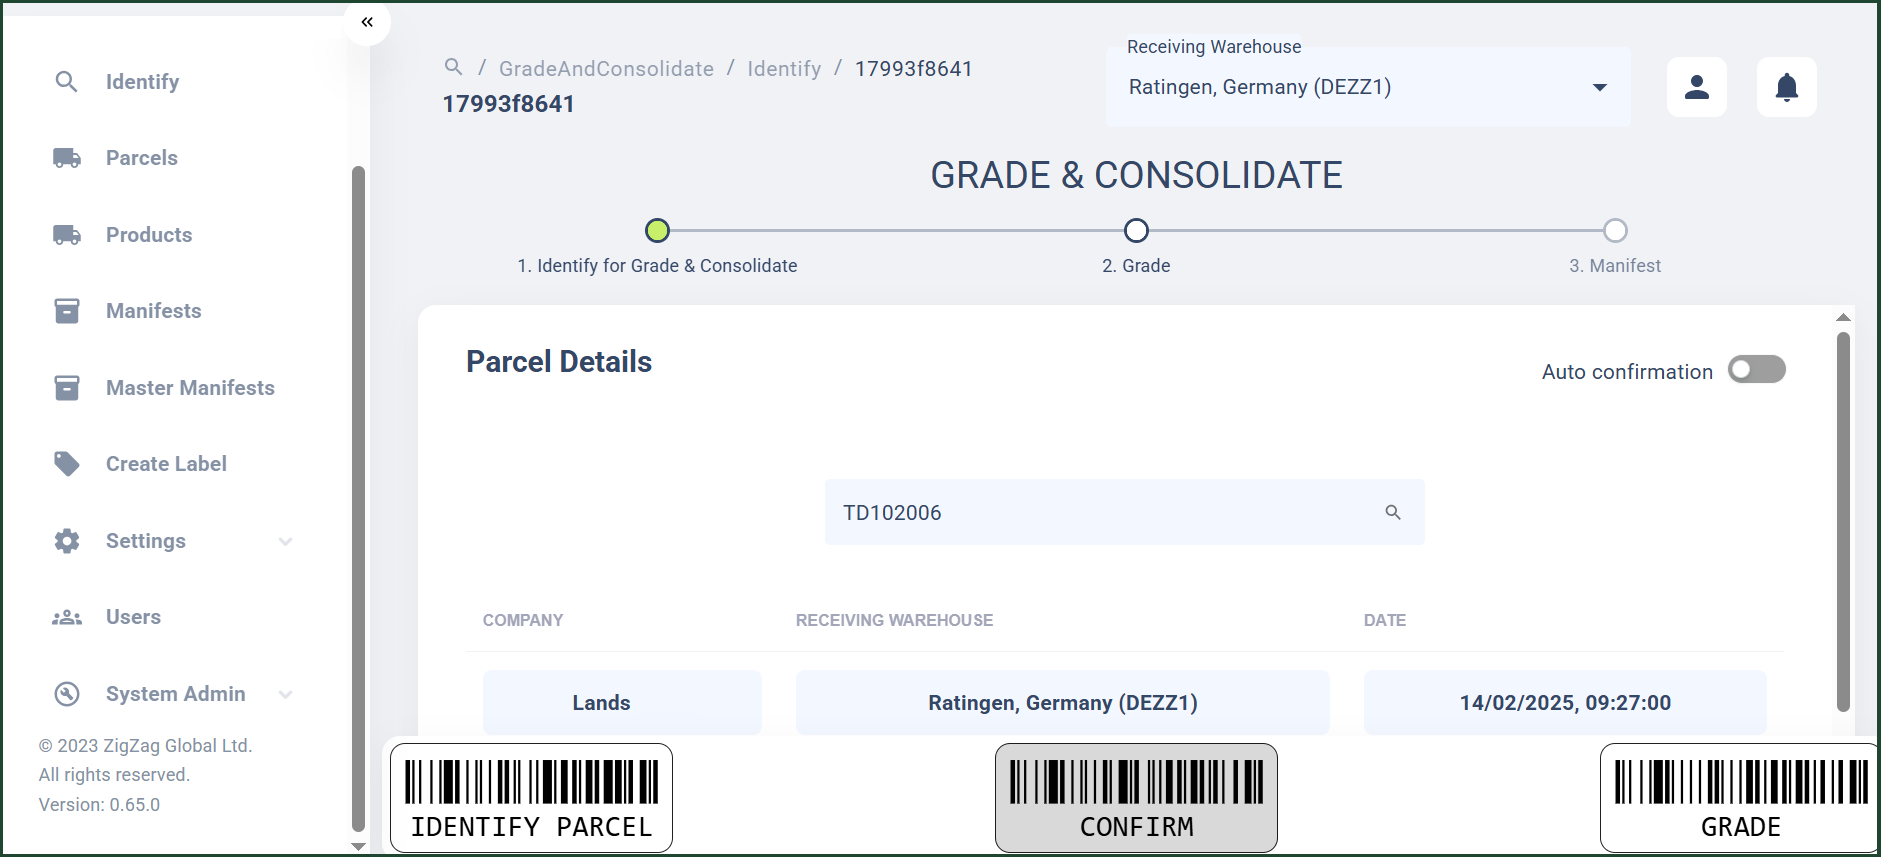
- After a parcel has been identified for grading and consolidation, you are navigated to the Parcel Details page where you can see parcel details such as:
- The parcel order number in the Parcel search field as you have entered it during the Identify step;
- The company to which the parcel belongs;
- The receiving warehouse where the parcel has been delivered;
- The date and time the parcel was received.
- In the Parcel Details page, if you are not sure that the parcel you have identified for grading and consolidation is the parcel you want to process, you can enter another parcel order number in the Parcel search field. You can also go back to Identify parcel page by clicking the Identify barcode button to do the same.
- If the parcel you have identified for grading and consolidation is the parcel you want to process, click the Grade* barcode button. You are navigated to the Grade Item page. To do that, you can also use the stepper by clicking the Grade step.
Grade Item page
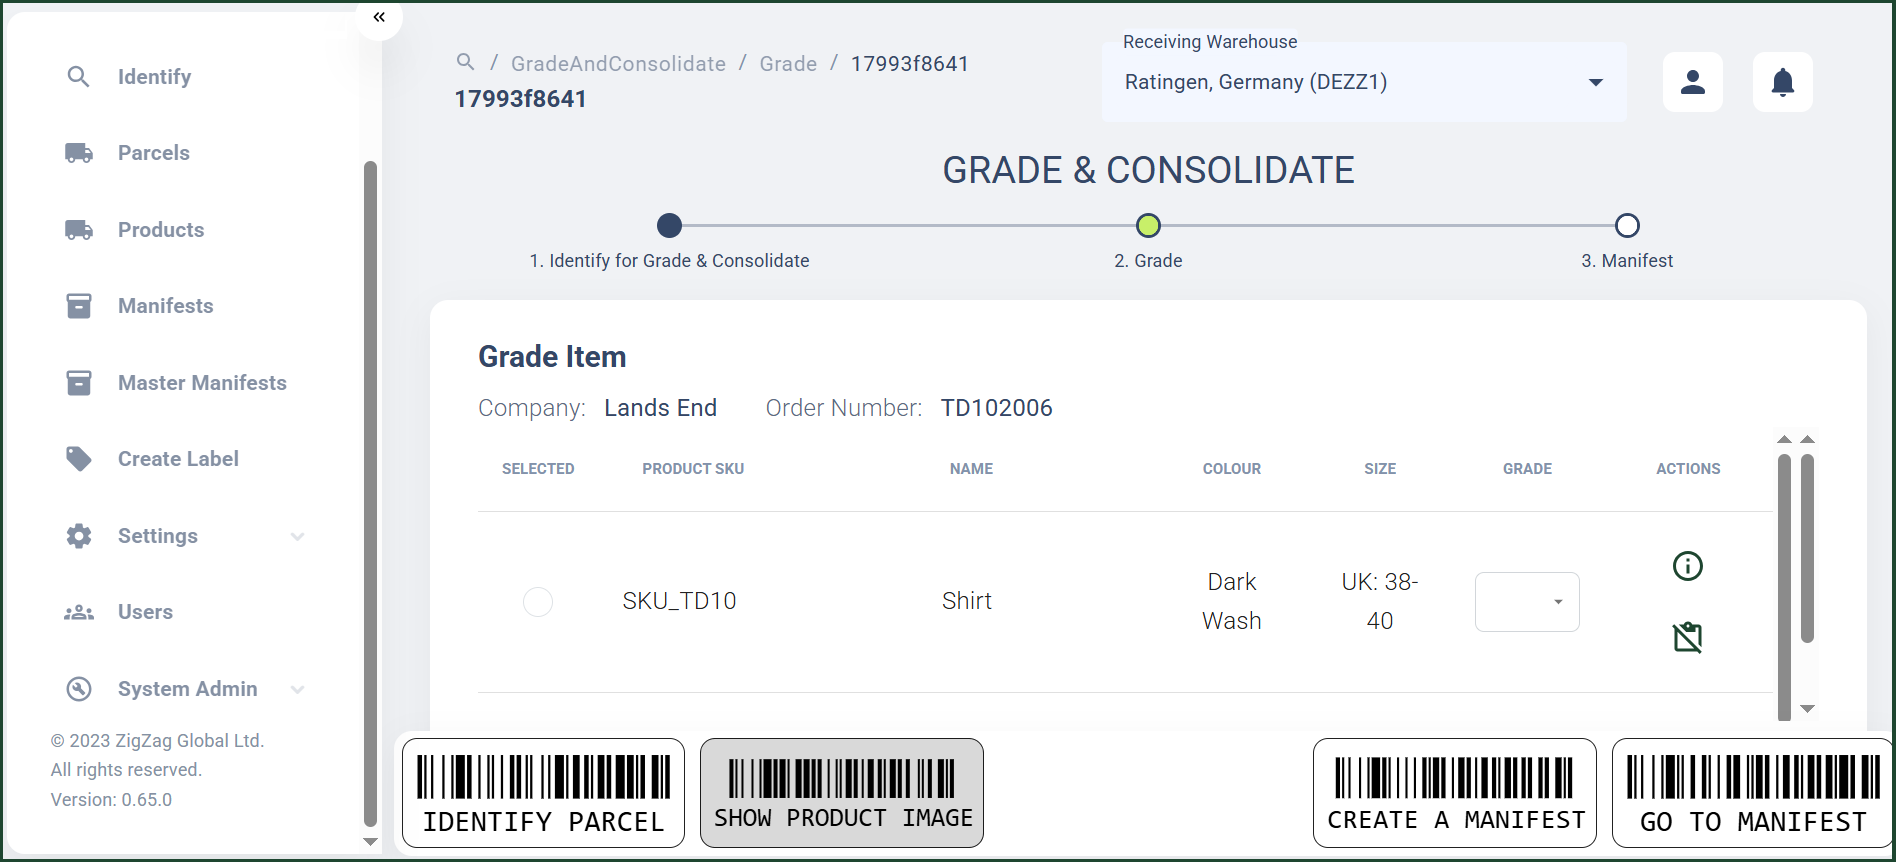
- On the Grade Item page, you can see all the items within the order that you can grade with information on:
- Product SKU
- Name
- Colour
- Size
- To minimise the use of a mouse, you can scan SKU or GTIN barcodes to automatically select the items which requires grading.
- Once a product record is selected, you can scan a graded manifest to assign the product. Each manifest is allocated a grade, so items are presorted when they are returned to the Retailer.
- If an item doesn't meet the grading criteria, additional grades can be allocated using the Grade drop-down field.
- Operators can view the products image to validate the item returned by scanning/selecting Show product image barcode button.
- From the Actions column, you can also unassign an item from the order by clicking on the Unassign icon.
- If you want to go to the Manifest page, click the Go to Manifest barcode button.
- On the Grade Item page, if you want to create a new manifest to which to assign the order for consolidation, click or scan the Create Manifest barcode button. A Create a Manifest dialog appears.
- In the Create a Manifest dialog, fill in the following fields:
- Destination Warehouse (mandatory) - select the destination warehouse where the new manifest will be delivered;
- Carrier Service (mandatory) - select the carrier service for the new manifest from the drop-down list with predefined carrier services;
- Grade - from the drop-down list with predefined grades, select the grade of the items within the orders that will be consolidated in the new manifest;
- Warehouse Position - select a warehouse position from the drop-down list with predefined positions; RMS automatically assigns the first possible position to the manifest but this can be overridden by your selection.
- Click Create. You are navigated to the Manifest page.
Manifest page
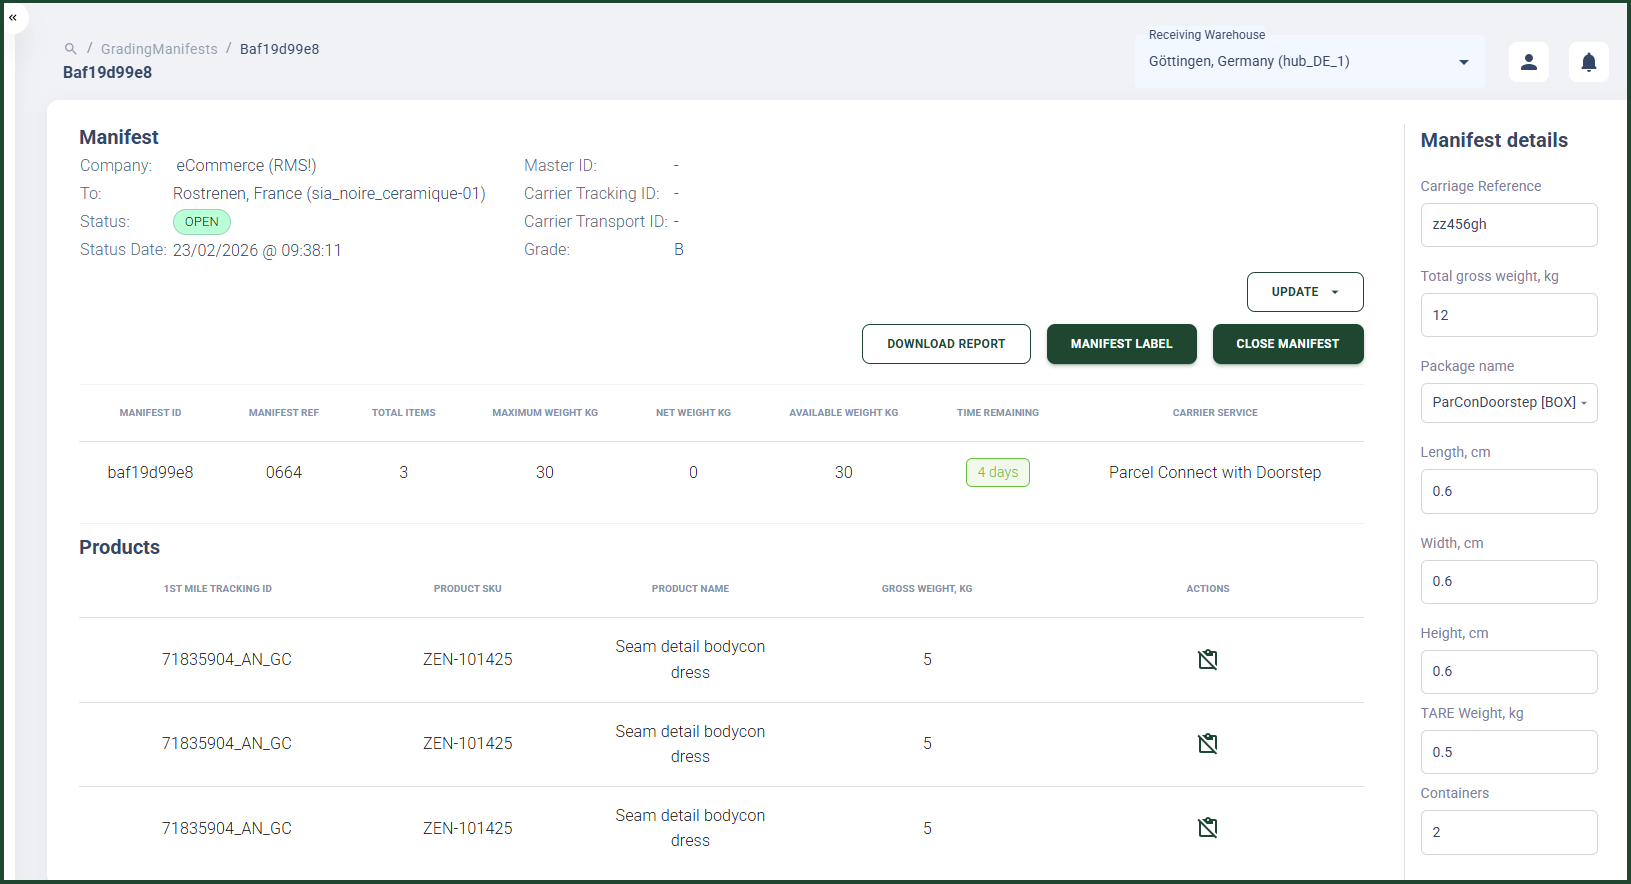
- On the Manifest page, you are able to see the following sections with relevant information:
- Manifest information section with details on:
- Company
- (To) Destination Warehouse
- Manifest Ref Number
- Tracking ID
- Grade
- Manifest table section with details on:
- Manifest ID
- Maximum manifest weight in kilograms
- Available weight in kilograms - this is the difference between the maximum manifest weight and the current weight of all the parcels assigned to the manifest
- Time remaining - this is the time that is left before you have to close the manifest
- Carrier Service
- Parcels table section with details on:
- Product ID - this is the parcel tracking number
- Product SKU
- Product name
- Gross weight in kilograms - this is the actual weight of the parcel
- Remove item icon button - the button allows you to remove a parcel from the manifest
- Manifest information section with details on:
- To see a Manifest Details report, click the Download Report button. The Manifest Details report will be downloaded on your device.
- To close the manifest, click the Close Manifest button.
- To generate a label for the manifest, click the Manifest Label button.
- To download the manifest label, click the Download PDF label button.
- To print the manifest label, click the Print ZPL label button.
Grading - Photo Evidence Capture
When photo evidence is required, operators are prompted to capture images as part of the grading workflow.
- A QR code is displayed, allowing operators to connect a mobile device (e.g. phone or tablet) to the grading session.
- Once connected, a guided capture experience is launched on the device, where operators:
- Follow step-by-step instructions for each required photo
- Capture, preview, and retake images as needed
- Confirm each image before progressing
- The number of images required is configurable per grade, allowing different requirements based on item condition.
- Images are uploaded and linked to the relevant item in the grading workflow.
- Where device capture is not available, operators can upload images manually as a fallback.