How to set up your Returns Portal
Overview
The Returns Portal setup step in the Onboarding Wizard guides you through configuring the core elements of your customer‑facing returns experience. During this step, you define your returns policy and refund timeframes, set up return reasons, and customise the look and feel of the portal, including branding and communication details, ensuring the portal is ready to support a consistent and compliant returns journey.
How to set up your Returns Portal
- Once you have successfully completed your Business Profile section, you can start your Returns Portal setup by clicking the Start button on the bottom right corner of the section.
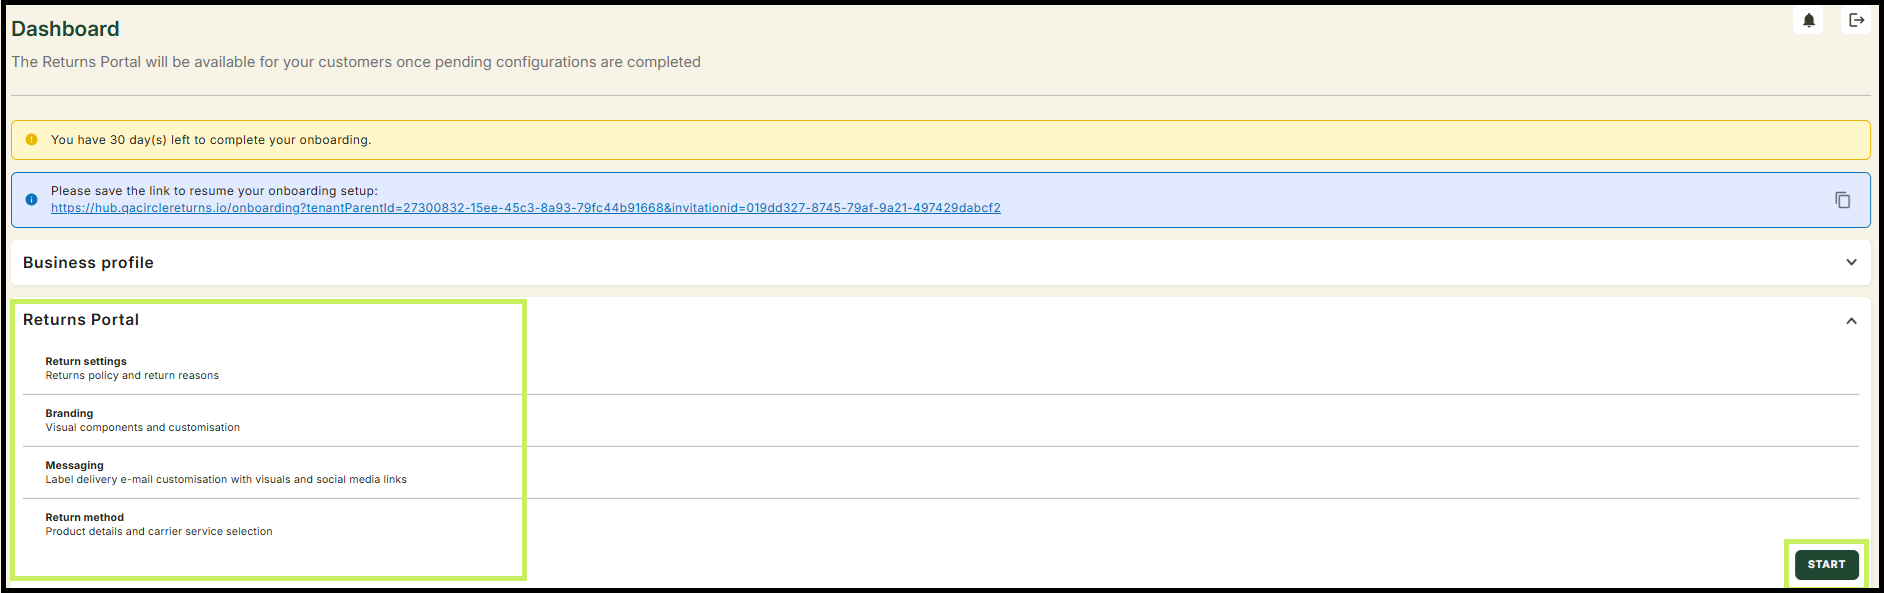
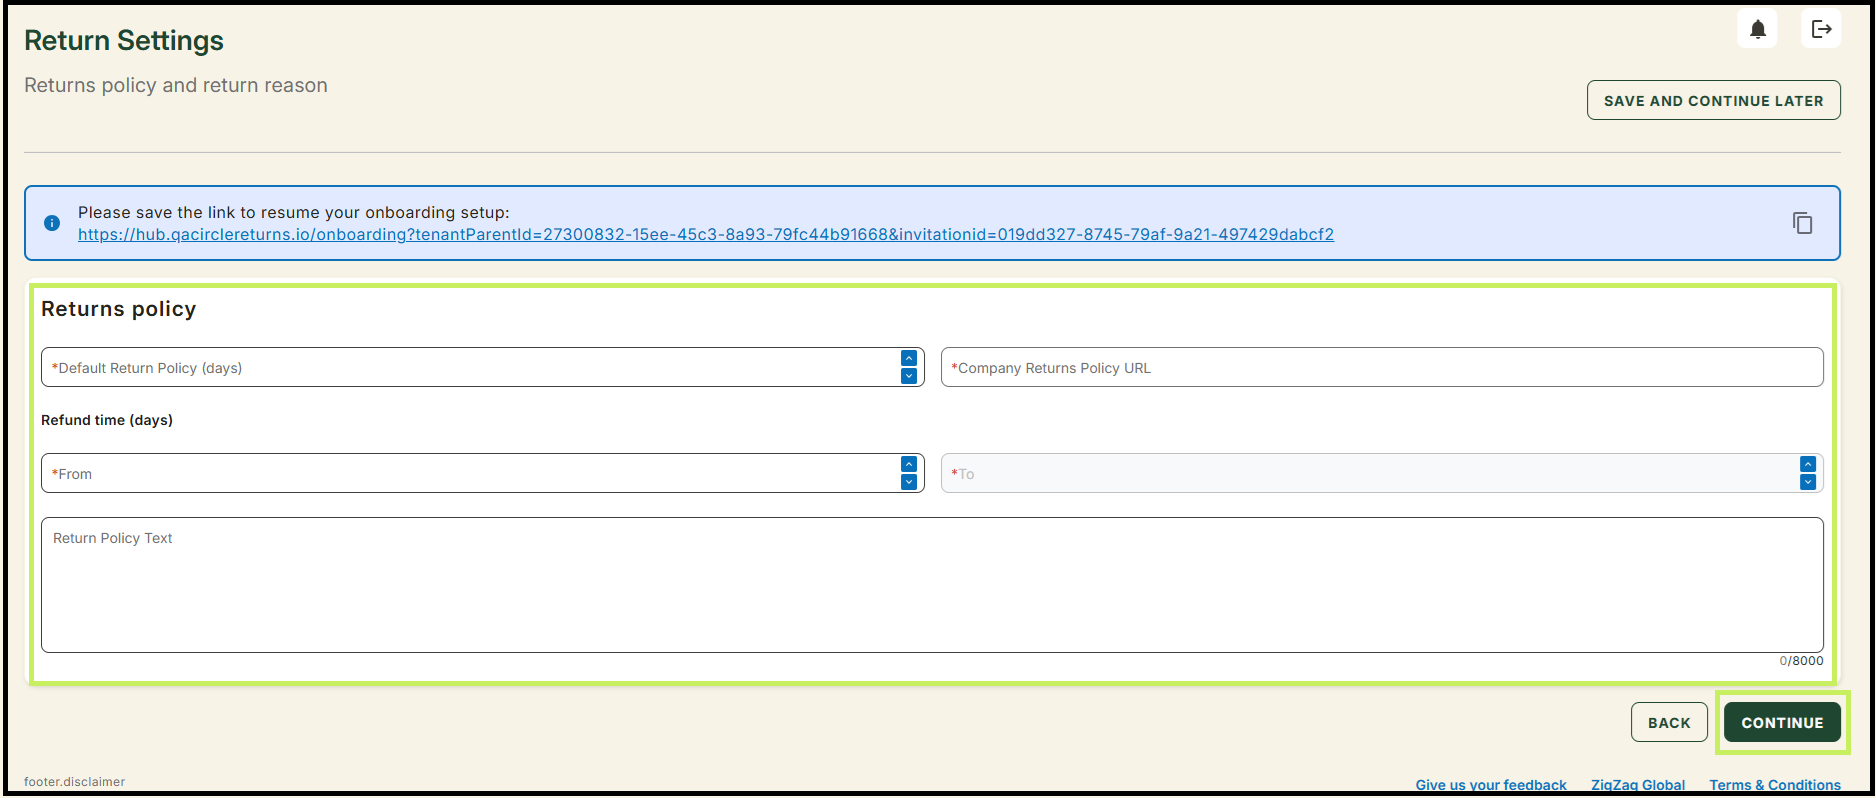
- The Return Settings subsection appears. In the Return Settings subsection, fill in the necessary fields.
note
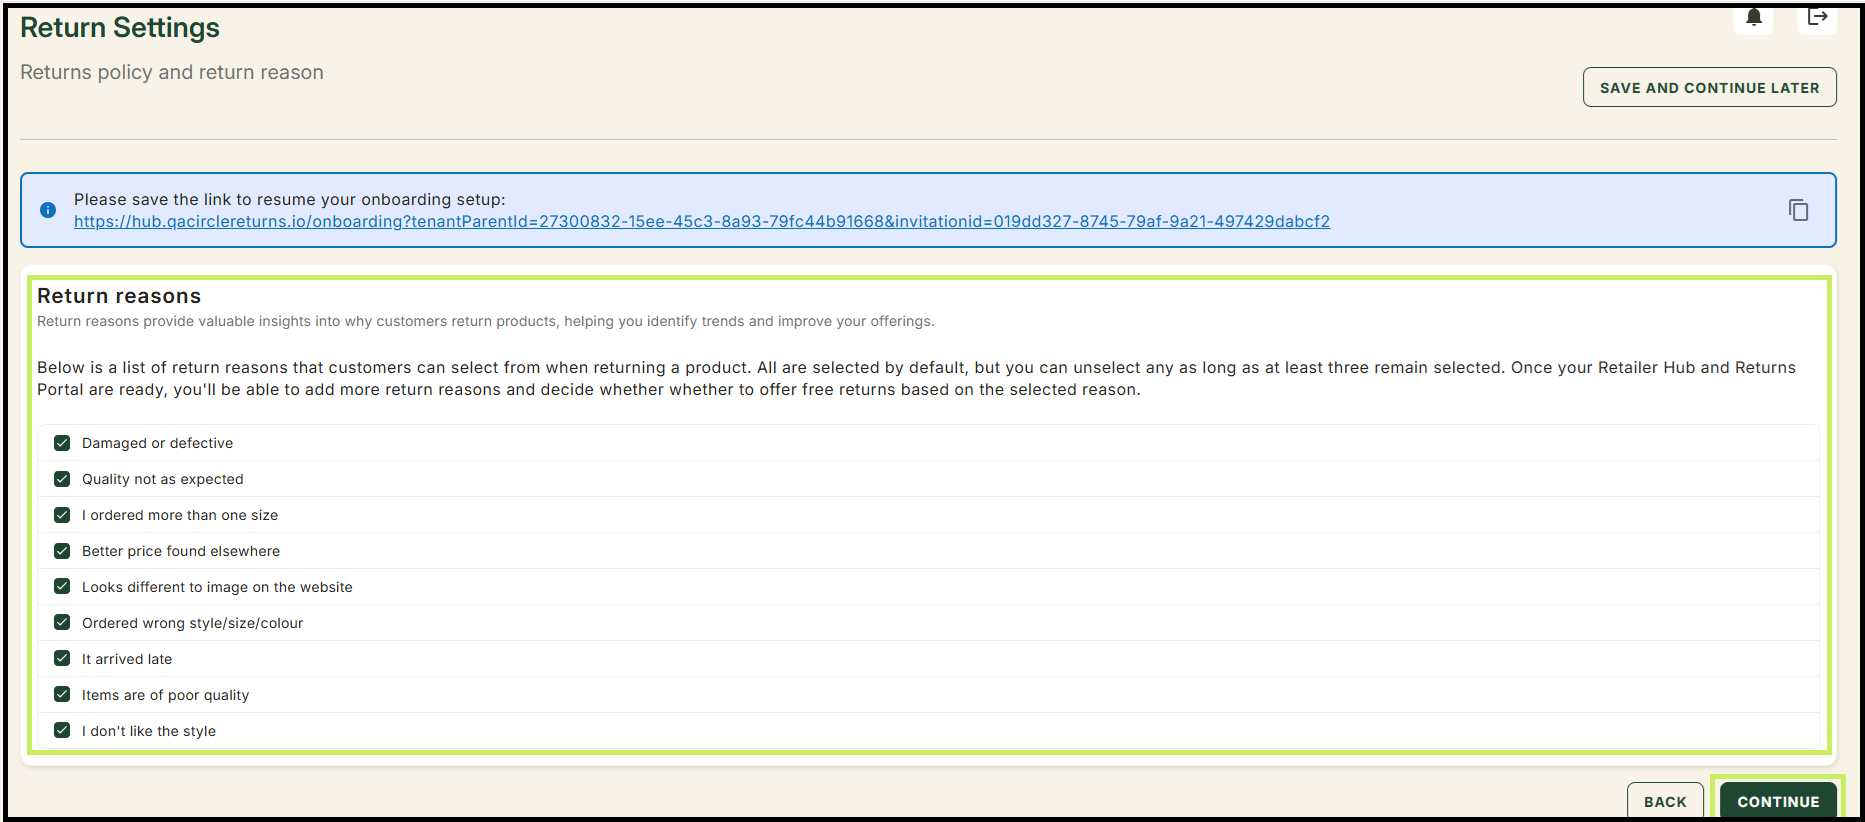
All selected return reasons can be used as options by your customers during their returns experience. You can unselect any of them as long as three (3) of them remain selected. Once your setup is submitted, our Implementations team will be able to create more tailored return reasons.
- Click Continue. The Onboarding Wizard will lead you to the Branding subsection where you need to fill in the necessary fields.
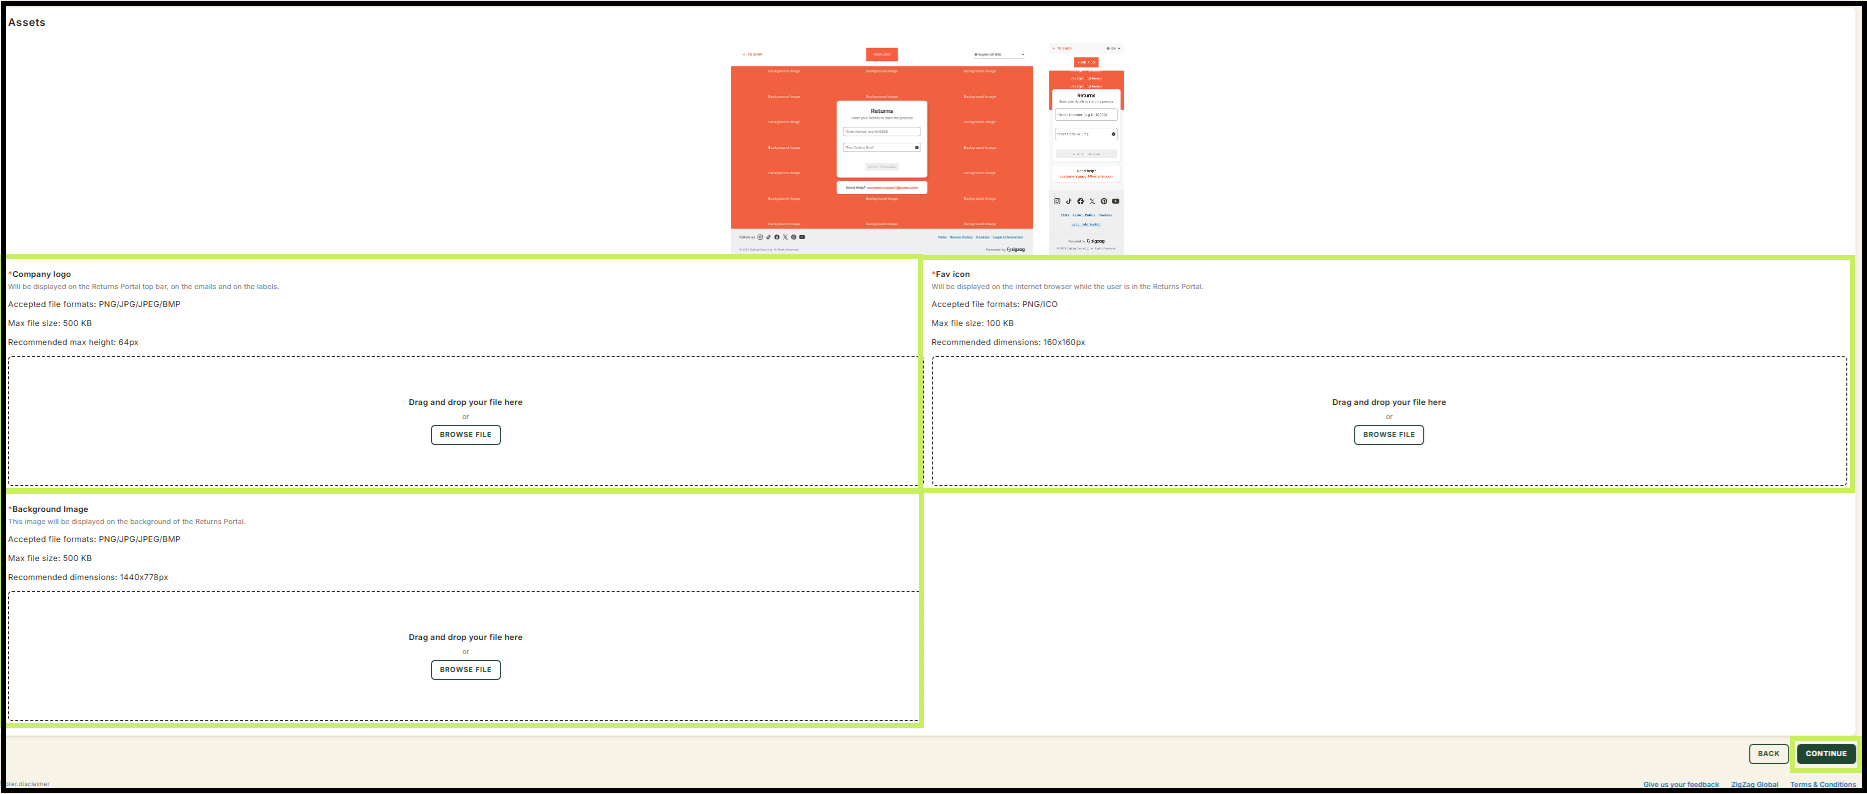
- Click Continue. The Onboarding Wizard will lead you to the Messaging subsection where you need to fill in the necessary fields.
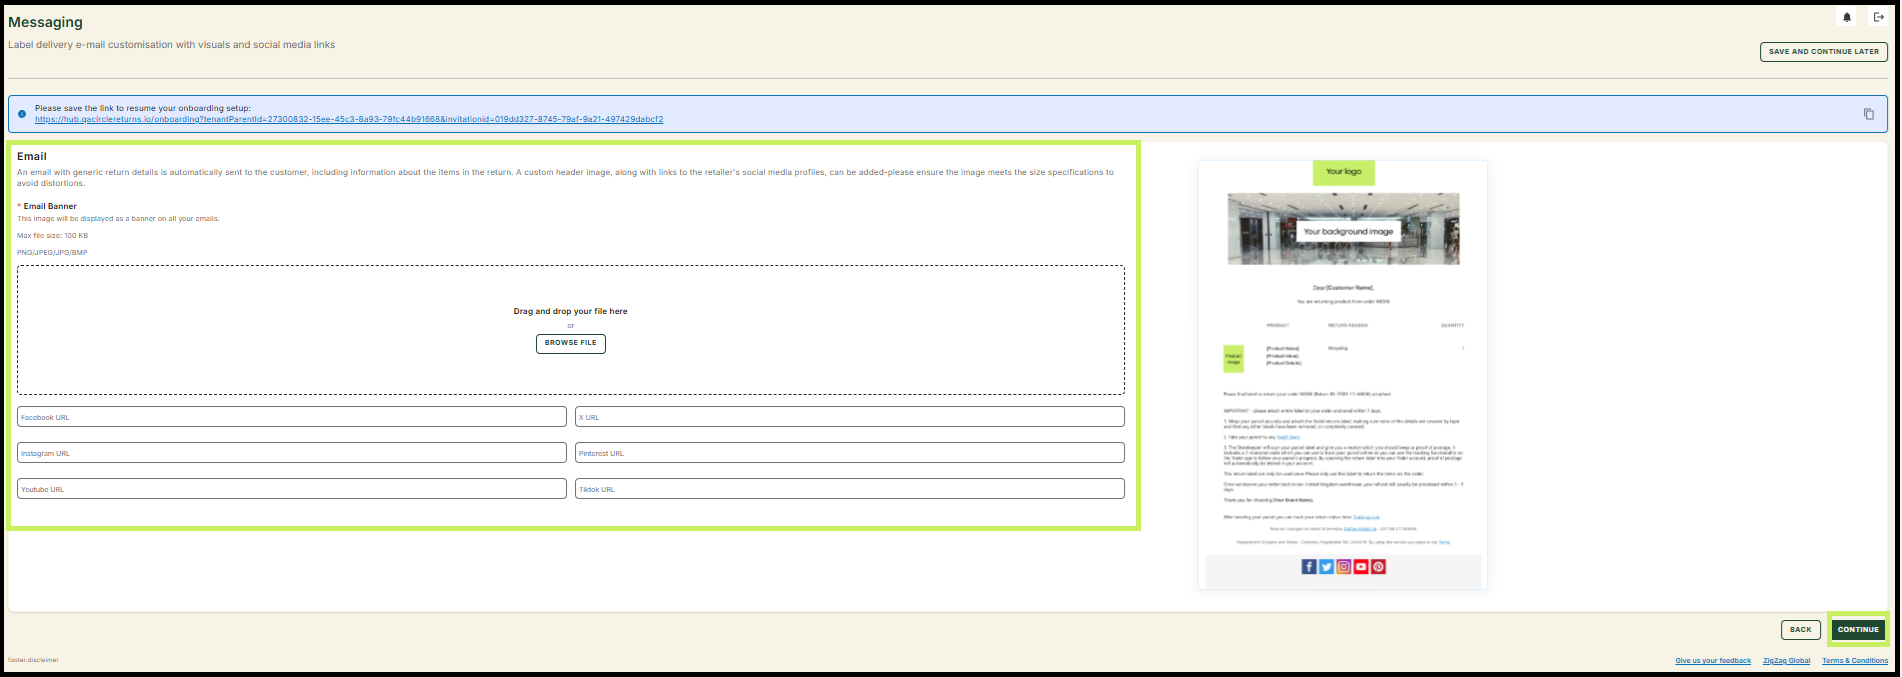
- Click Continue. The Onboarding Wizard will lead you to the Return Method subsection where you need to fill in the necessary fields.
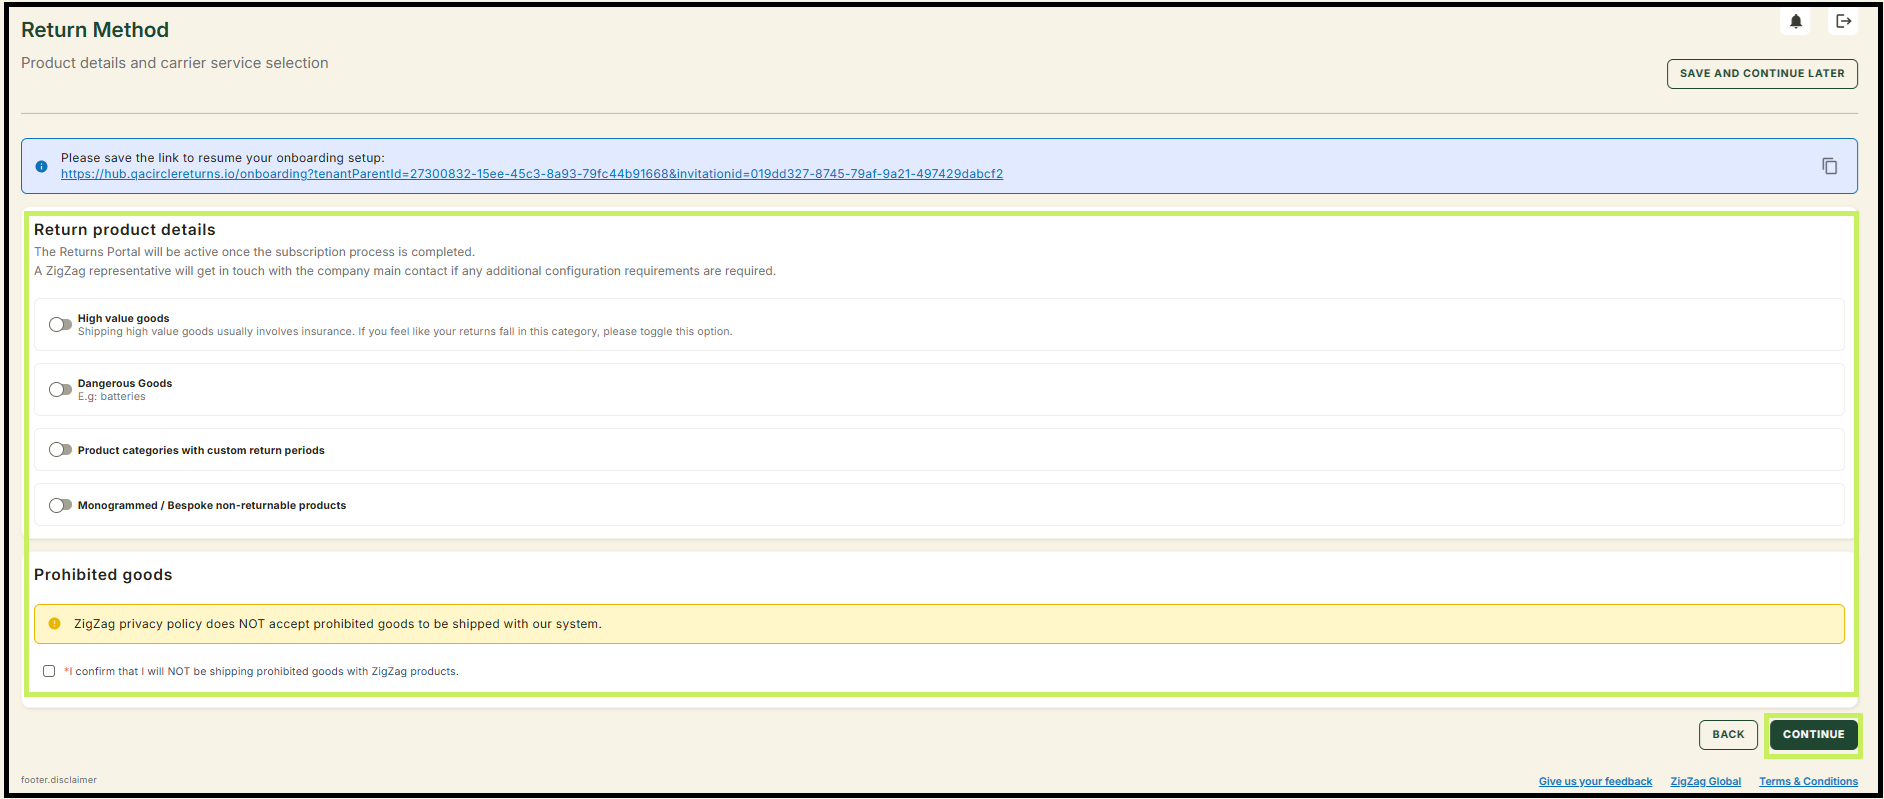
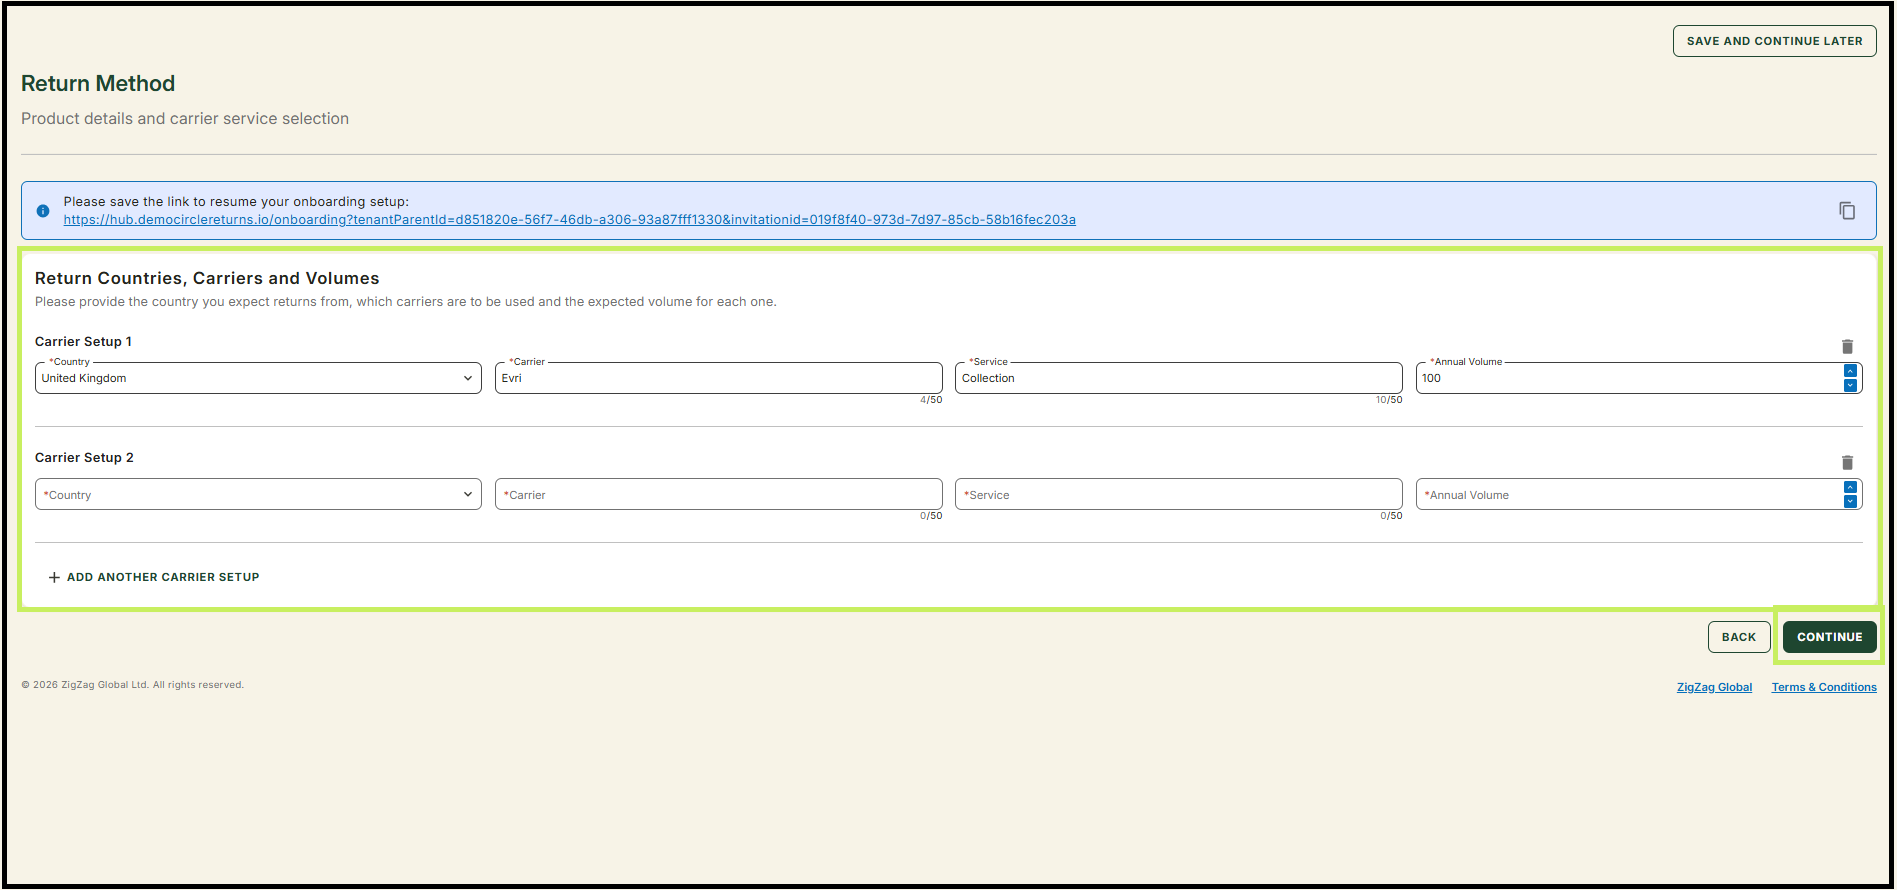
- Click Continue. The Onboarding Wizard will lead you to the main dashboard. If you need to edit the information in any of the sections, you can do that by clicking on the relevant section. Once all the information is correct, click the Submit setup button.