How to set up your Business Profile
Overview
The Business Profile step in the Onboarding Wizard allows you to provide your core company details, ensuring your Retailer Hub and Returns Portal are created with accurate and consistent information. This includes capturing essential business data required to identify your company within ZigZag systems, forming the foundation for subsequent setup steps and enabling a smooth and validated onboarding experience.
Setting up your account sections happens in the order displayed on the Onboarding Wizard dashboard. You cannot set up a section without completing the previous one first.
You have 30 days to complete your setup. In case you cannot do it within this period, contact your Account Manager to request an extension. Otherwise, you will loose all your progress.
How to set up your Business Profile
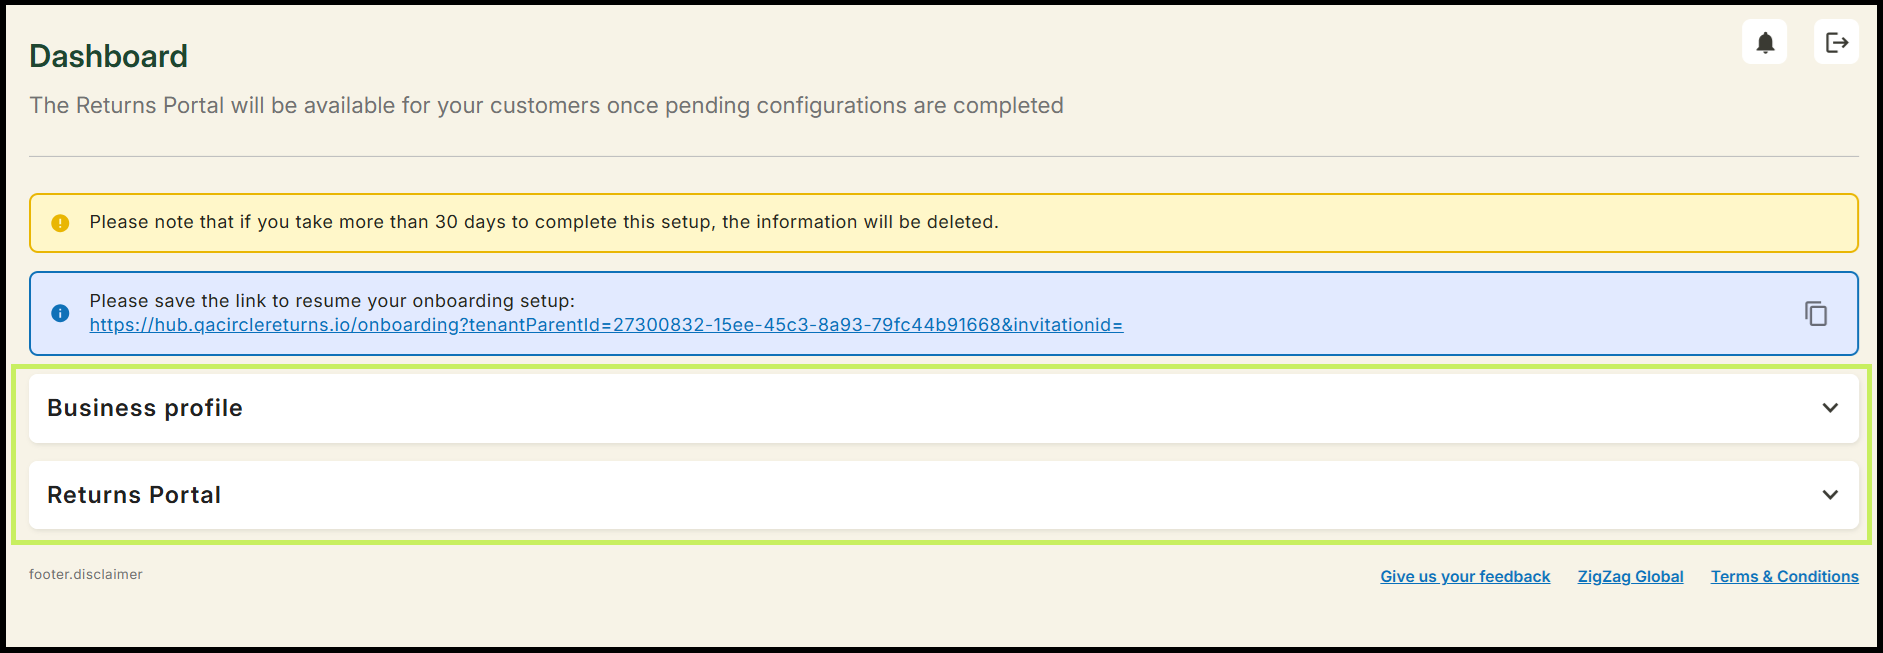
- Click the link provided to you by ZigZag Global and select the Start Onboarding button. The Onboarding Wizard main dashboard appears with the Business Details section and the Returns Portal section organized in collapsible blocks.

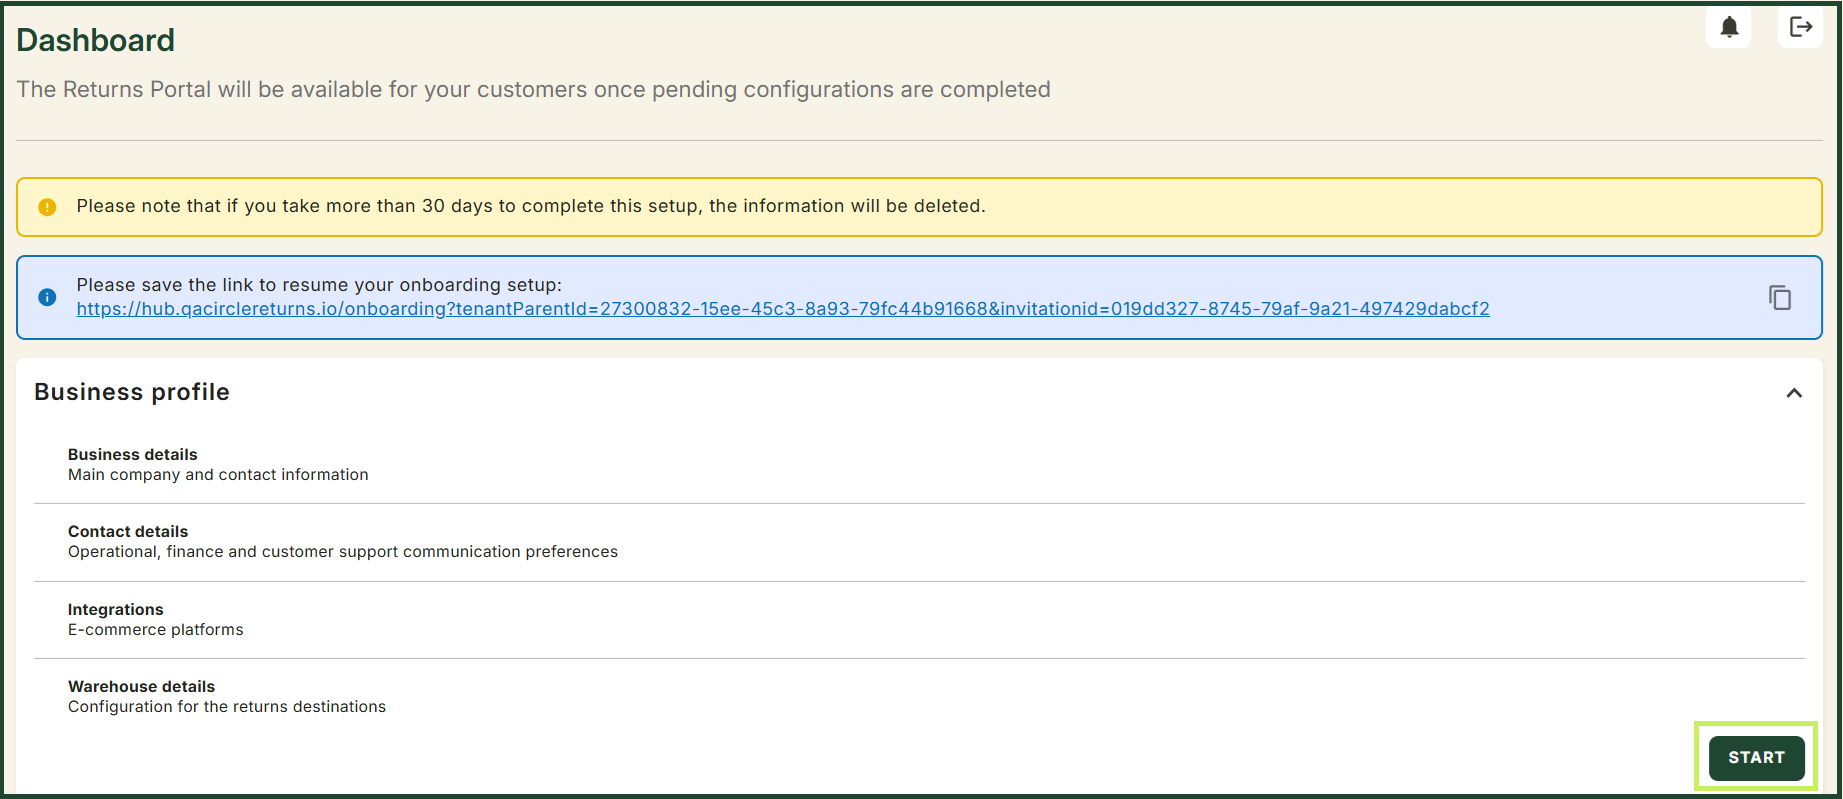
- To start setting up your Business Profile, click the Continue button on the bottom right corner of the Business Profile section.
- The Business details subsection appears. In the Business details subsection, fill in the necessary fields.
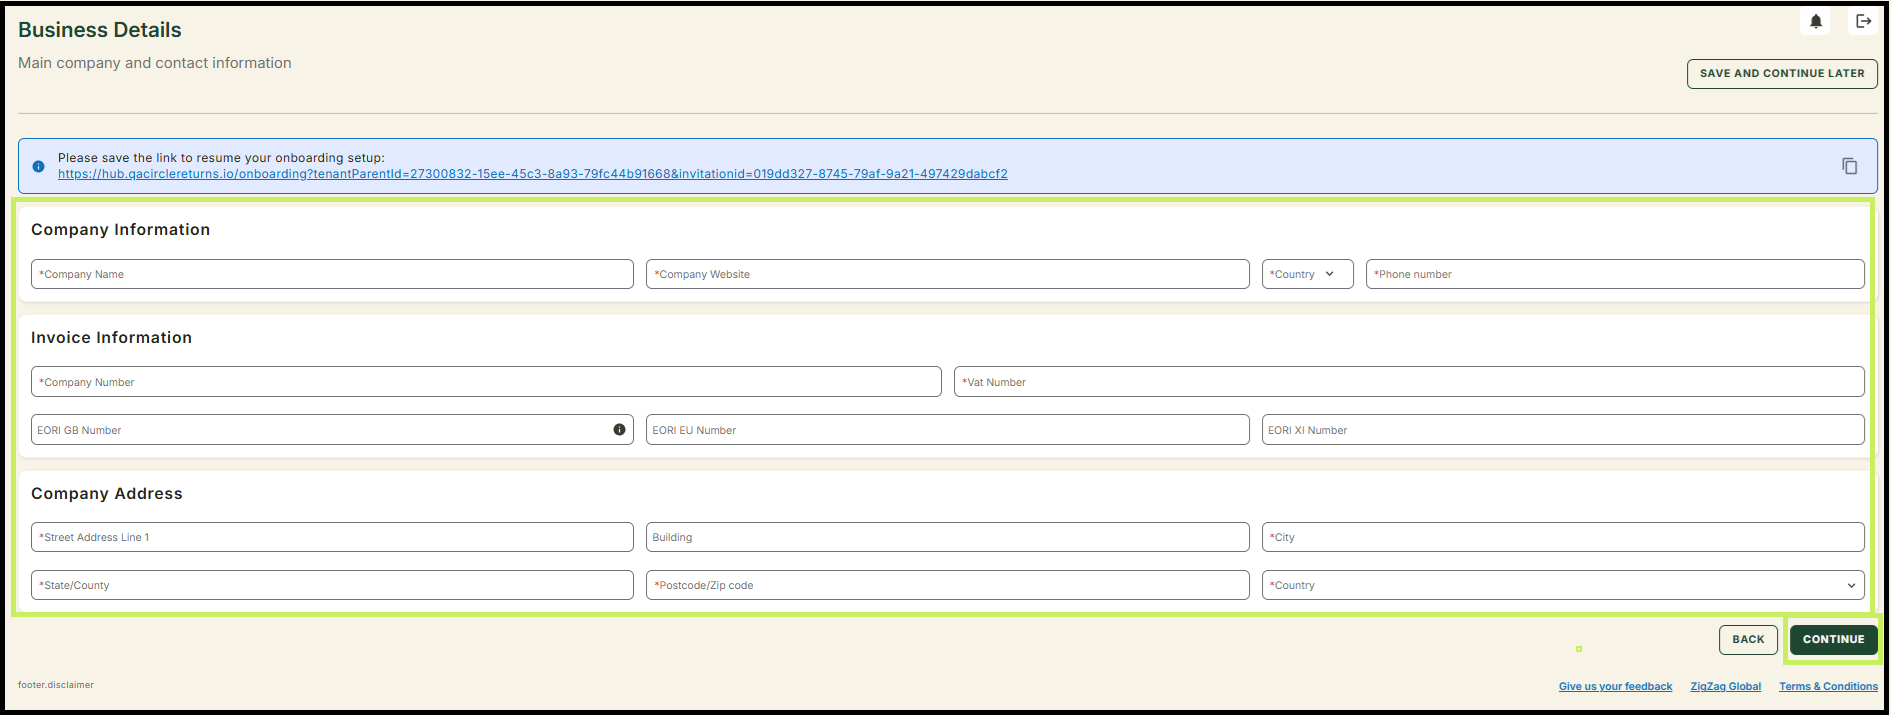
- Click Continue. The Onboarding Wizard will lead you to the Contact Details subsection where you need to fill in the necessary fields.
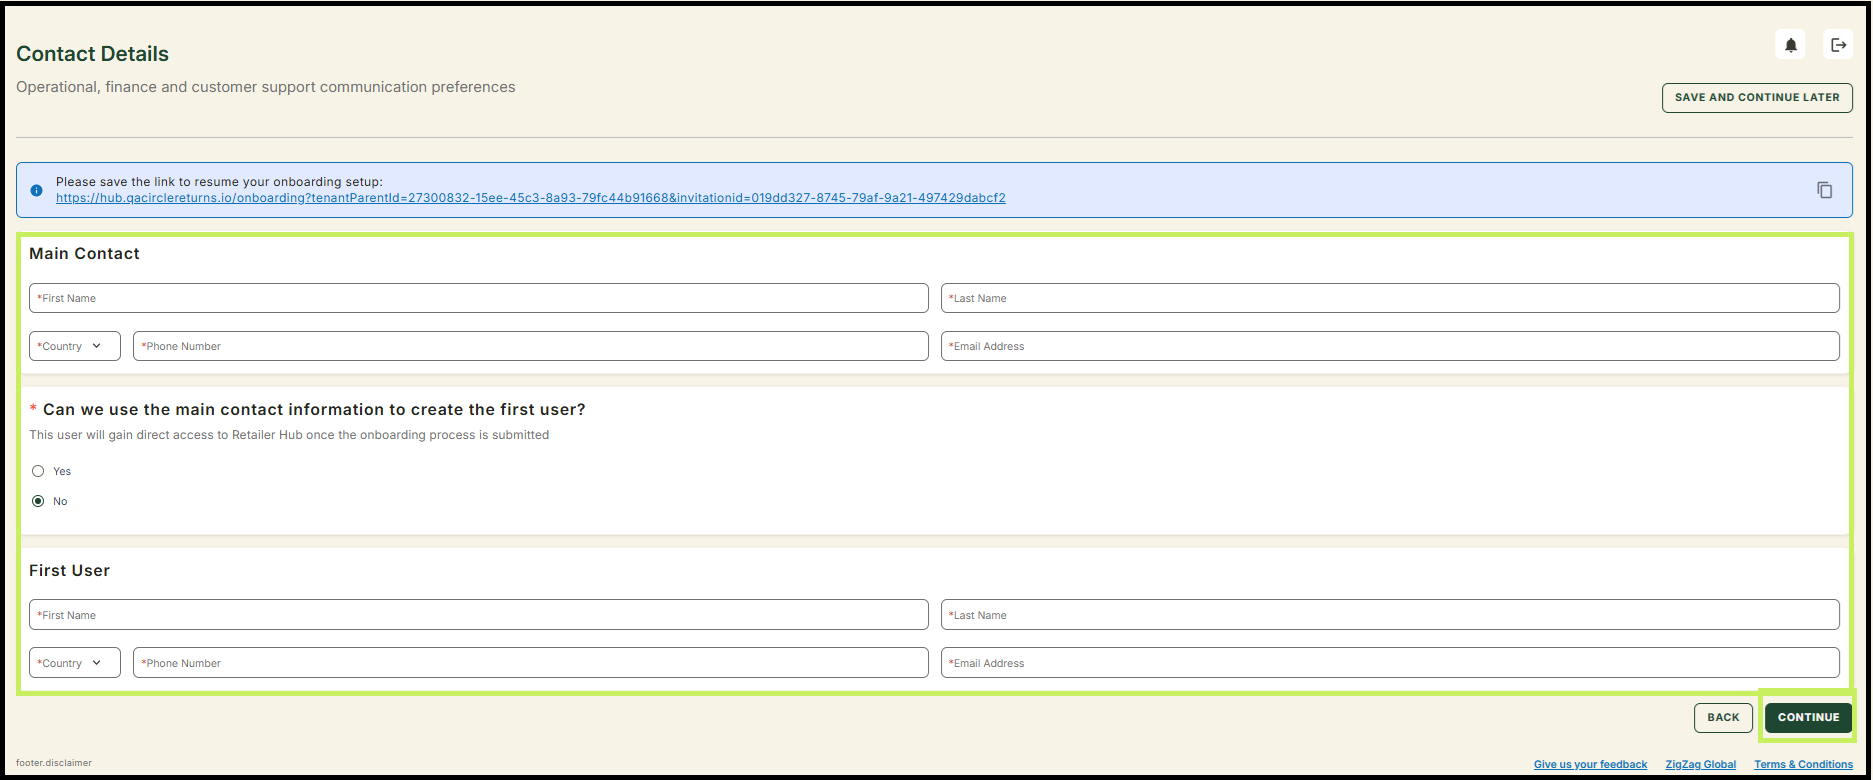
Select the respective radio button (Yes/No) to choose whether we use the main contact information to create the first user. This is the user who will be able to log in to the platform once the setup is complete. If you select No, additional first user fields appear where you need to fill in the contact details of your chosen first platform user.
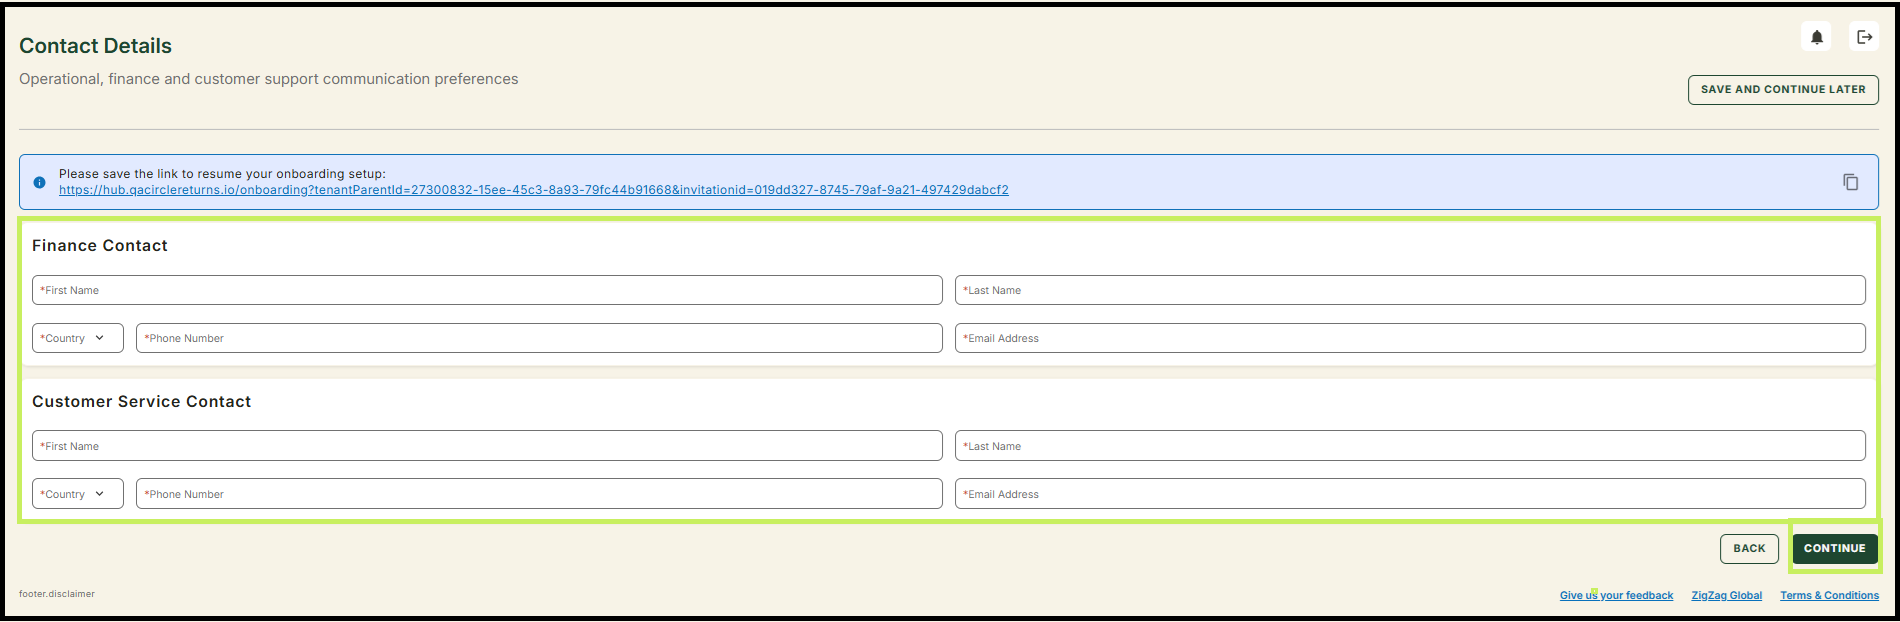
- Click Continue. The Onboarding Wizard will lead you to the Integrations subsection where you need to fill in the necessary fields.
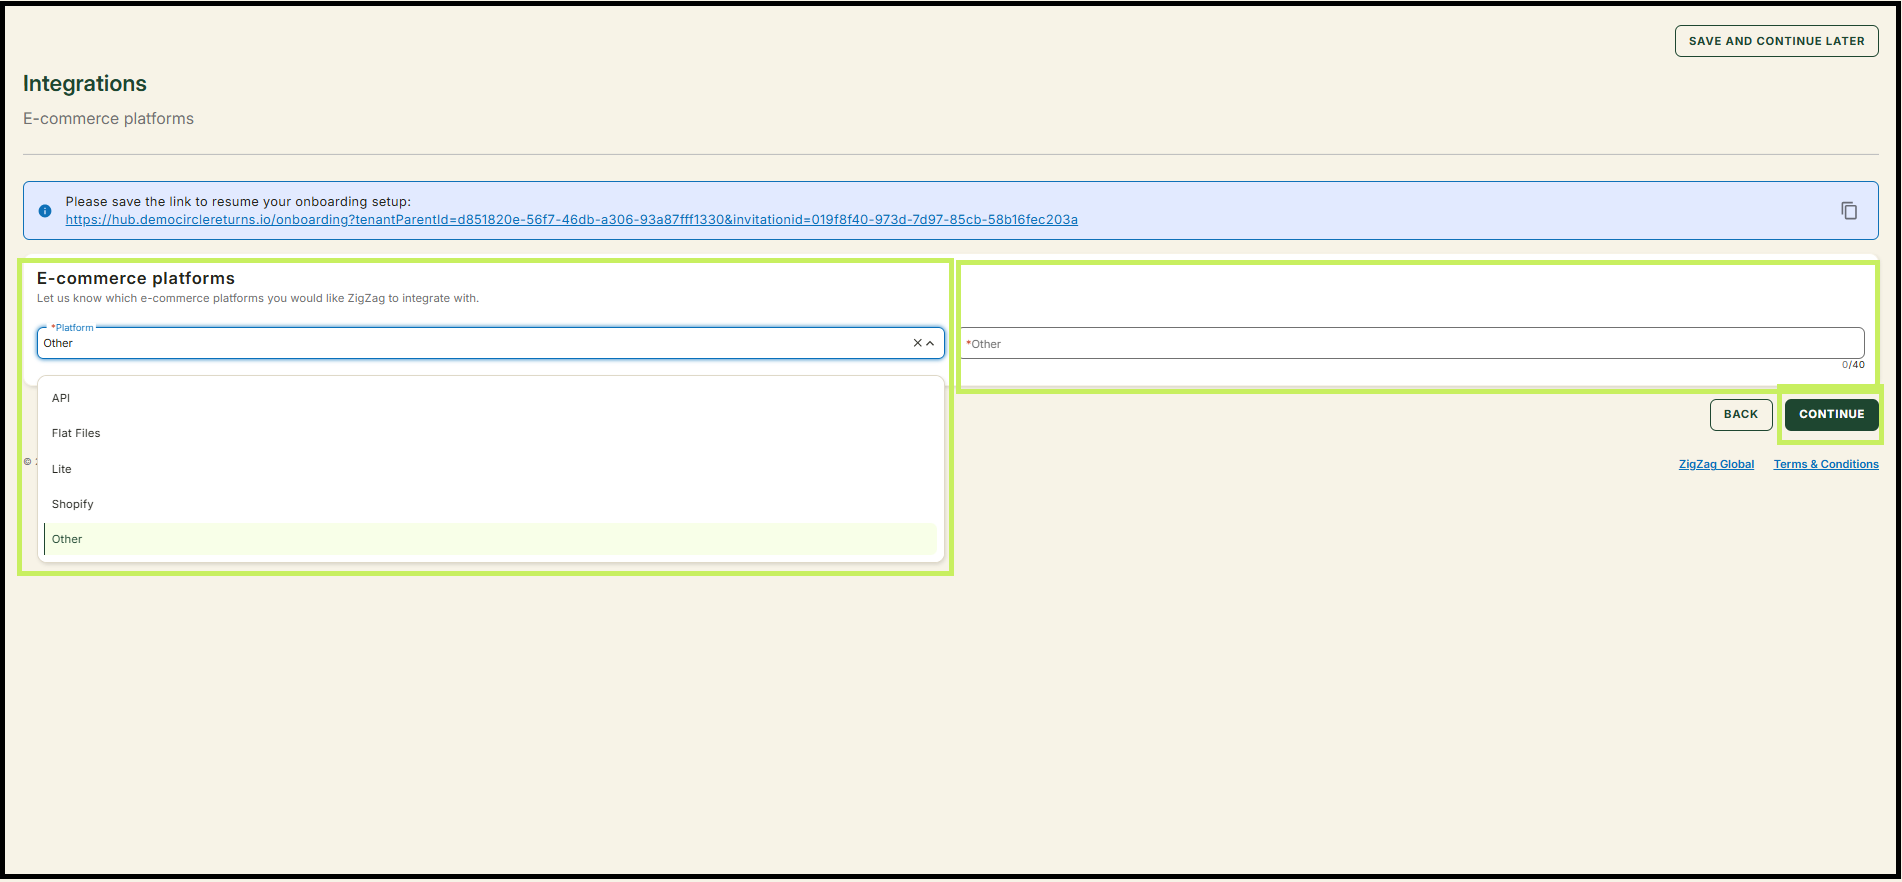
If you'd like to suggest another platform, select "Other" from the options in the E-commerce platforms dropdown menu and then fill in the text field.
- Click Continue. The Onboarding Wizard will lead you to the Warehouse Details subsection where you need to fill in the necessary fields for your Destination Warehouse. You can add up to 3 destination warehouses for your initial setup. Once you have your Retailer Hub account, you will be able to add more.
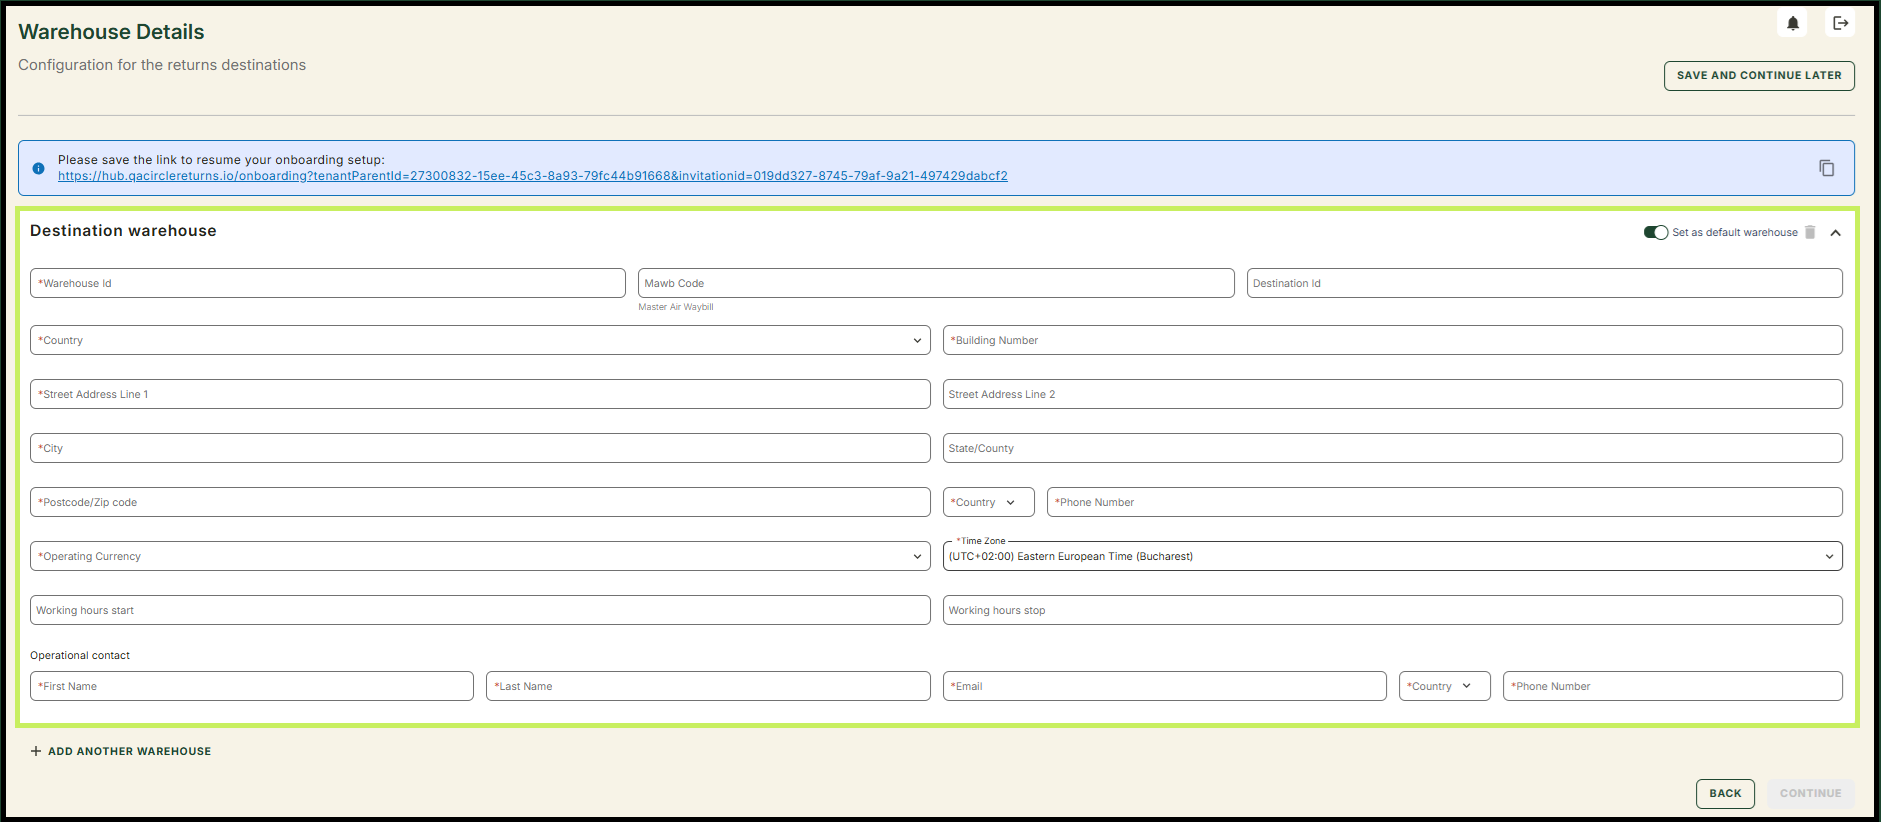
Please make sure to set a destination warehouse as a default one to be used as fallback when no specific warehouse is assigned. You can do that by sliding the Set as default warehouse toggle on the upper right corner of the section.
- By filling in the Warehouse Details subsection, you have completed your Business Profile setup. Click Continue. The Onboarding Wizard will lead you to the next phase of your onboarding - the Returns Portal setup.